

Croissants are a tricky pastry to master, but one of the first steps to improving is understanding what went wrong. From lamination to proofing to dough mixing, here is a list of issues that are holding you back from making the perfect croissants. Keep practicing and you’ll get the perfect honeycomb crumb in no time!
This guide is organized from most common to lease common reasons for imperfect croissants, in my experience.
Want to save this recipe?
Some overall tips to help you troubleshoot
- Take notes throughout the process, from mixing dough to laminating to proofing. Note any formula changes, the temperature of your environment, and the weather. Taking detailed notes will help you notice overall patterns and form hypotheses on how to improve future batches
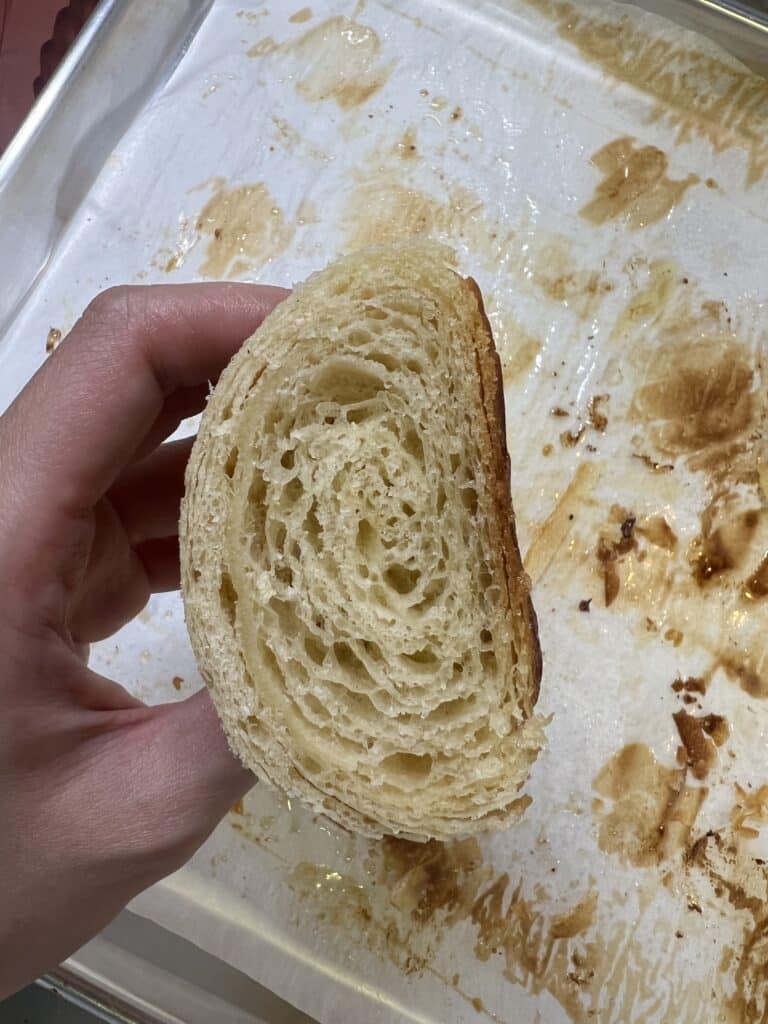
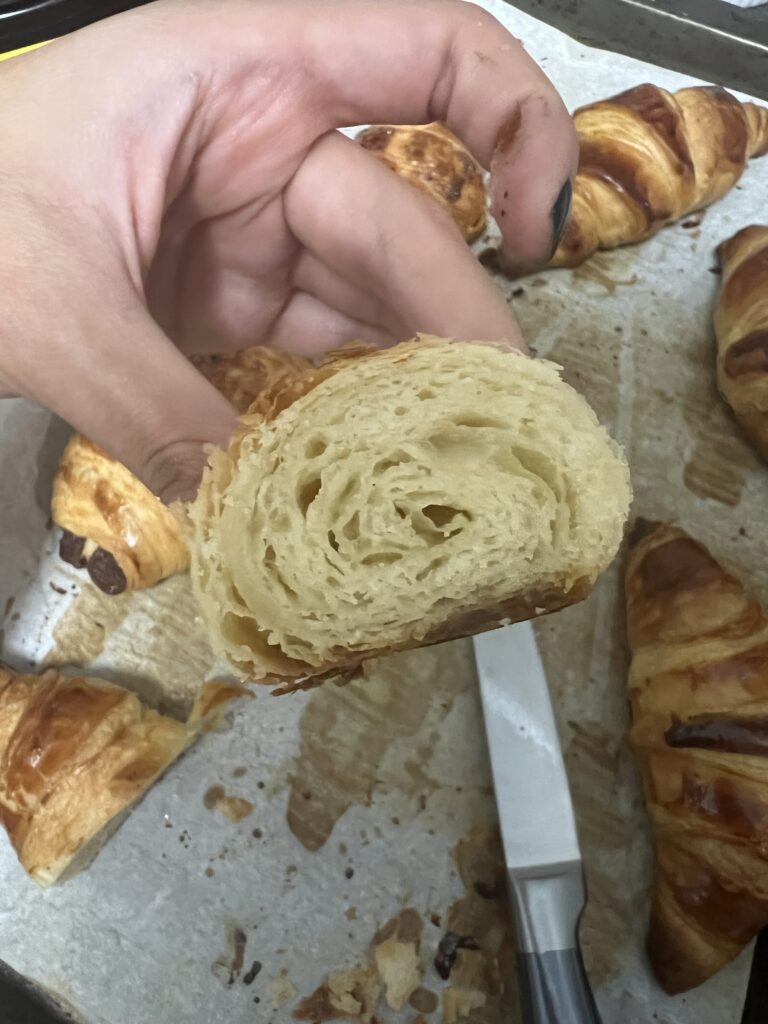
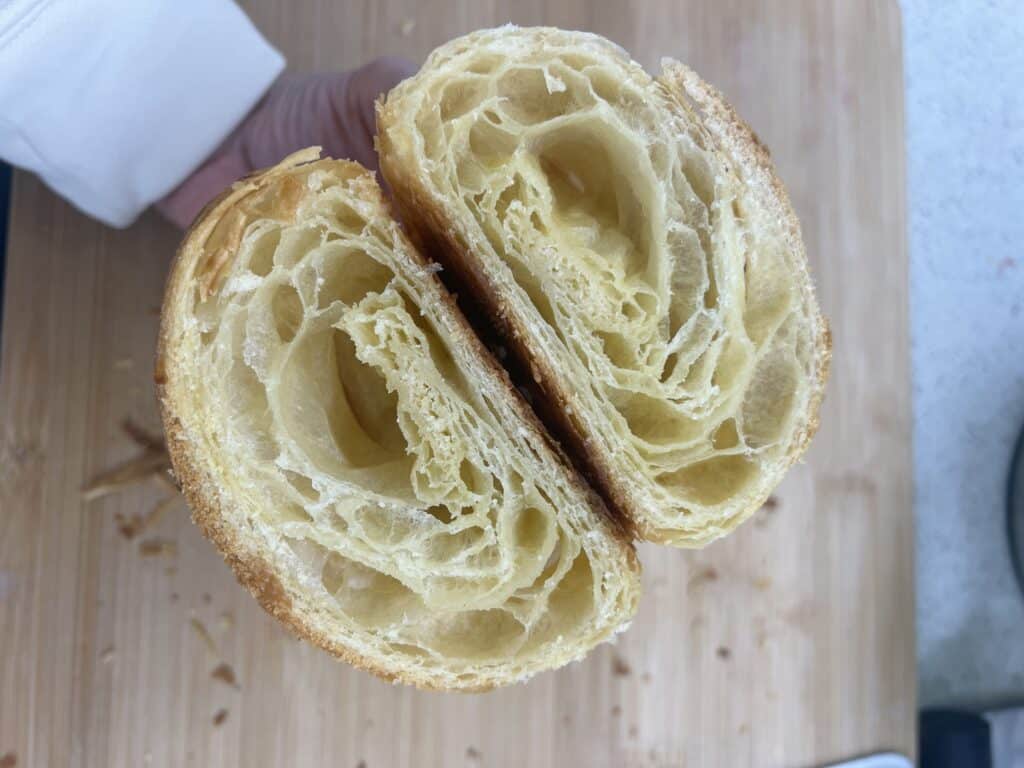
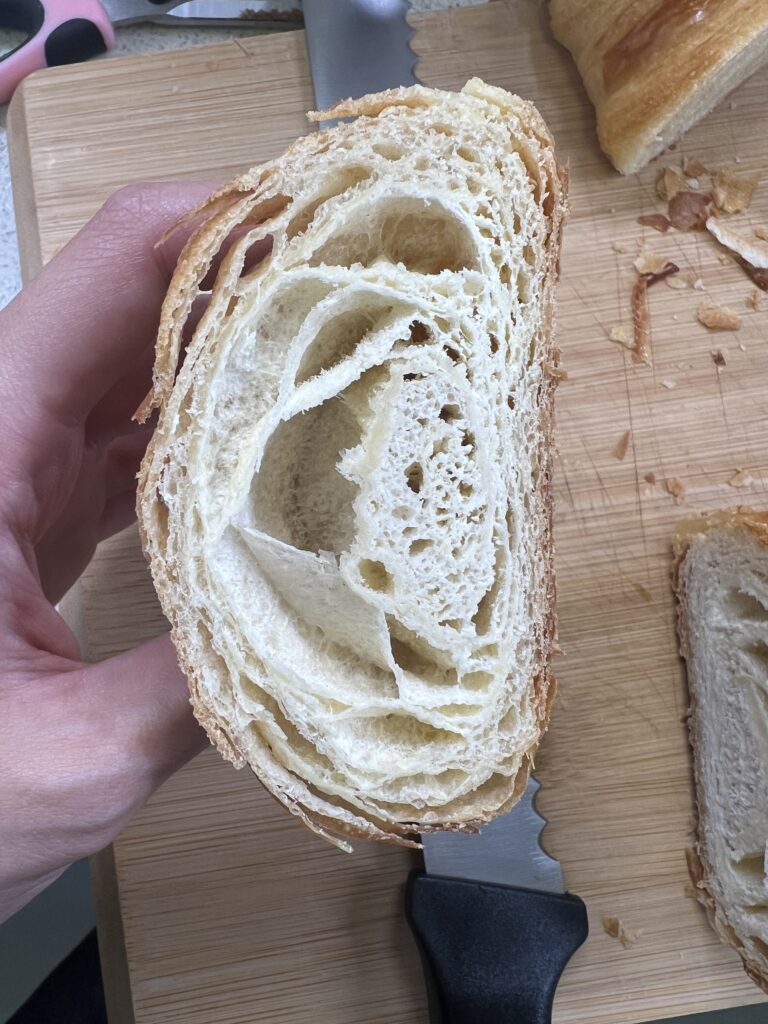
- Examine the crumb of each batch of croissants. For a clean crumb, make sure the croissant is fully cooled down before slicing to avoid smooshing the layers
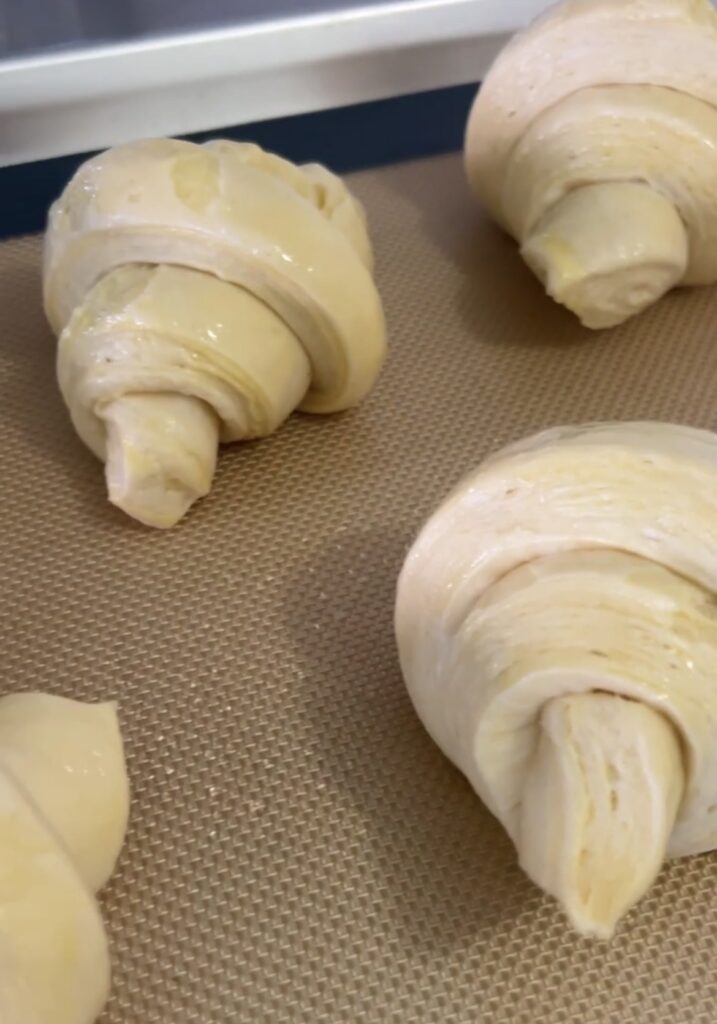
Lamination Problems
For beginners, lamination problems are the number 1 most common issue that I see. If you’re just getting started and having trouble making croissants, it’s probably a lamination problem.
Butter melted into the dough
Signs that the butter melted into the dough
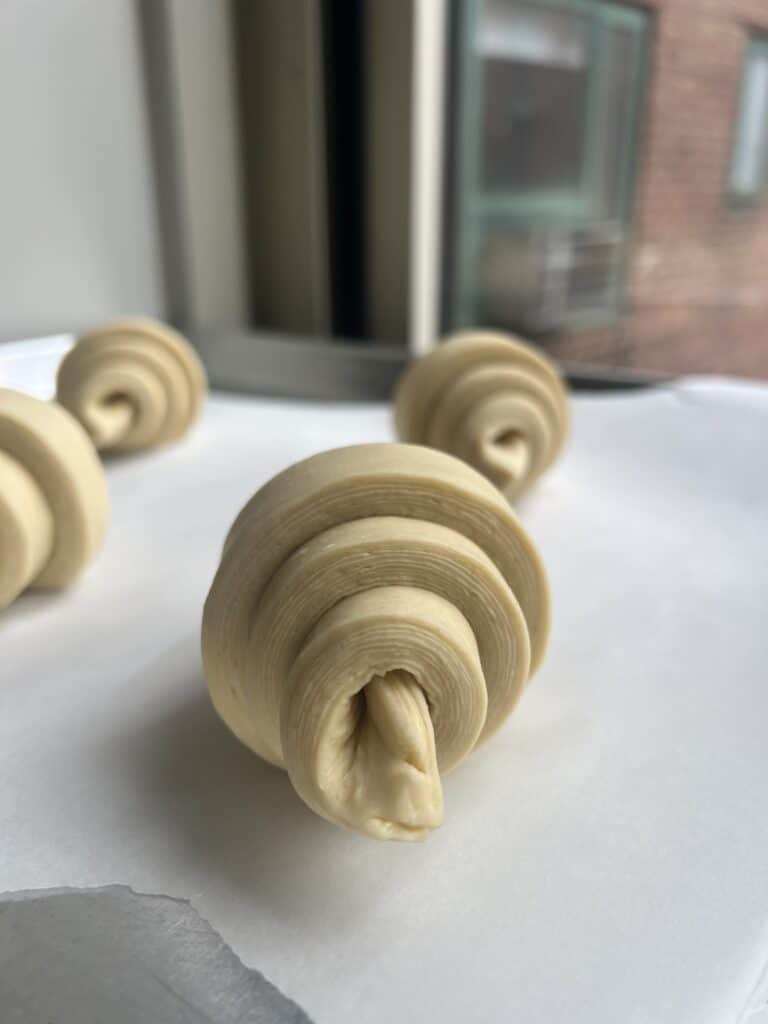
- When you cut the dough during shaping, you cannot see clear layers of dough and butter
- Dough feels greasy during rolling and shaping
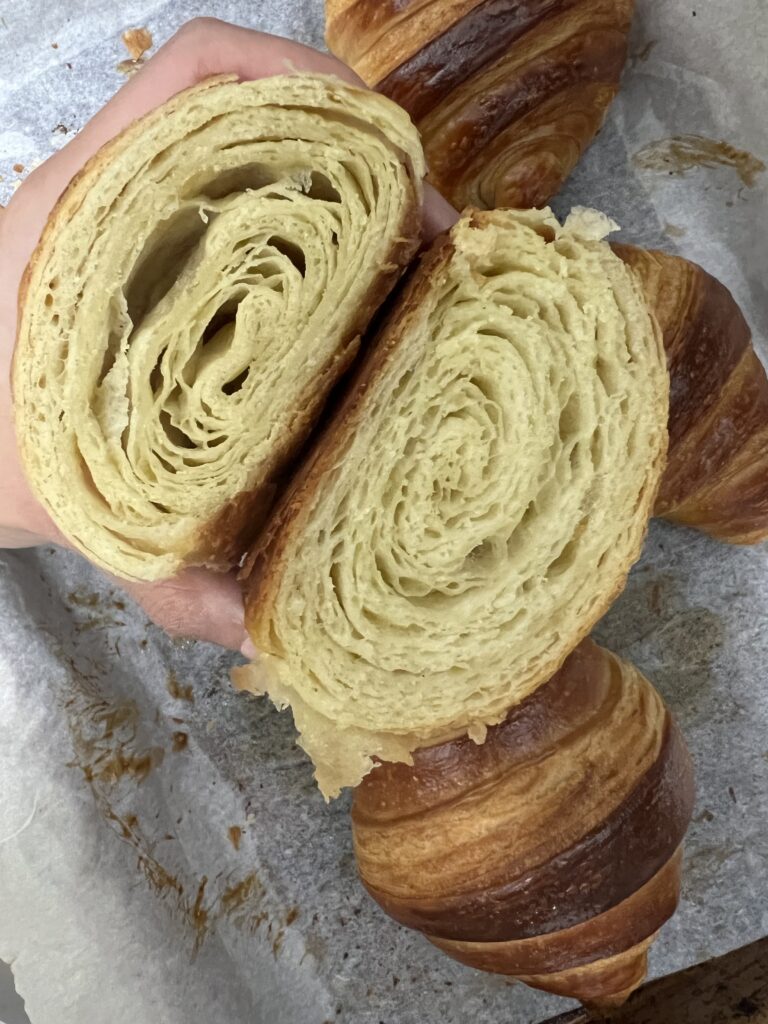
- Cross section of the croissant lacks a distinct honey comb and looks more like a brioche crumb
How to prevent the butter from melting into the dough
The key here is temperature control, making sure that the dough does not get too warm. Remember that even if the ambient temperature is cool, the friction of lamination will naturally increase the temperature of the dough.
- Freeze the dough before locking in the butter. I aim for 4 – 7C
- Keep your work environment and counters cold
- Avoid working in direct sunlight
- During the summer, I like to chill the countertop with ice packs before rolling
- If you have AC, turn it on. I like my environment to be 21C or colder
- Work quickly and as soon as the dough starts to soften and feel floppy, place in the freezer for 10 minutes to cool down, then continue to roll
- When rolling, push in an outwards motion rather than a downwards motion. This will help you laminate faster and more efficiently
- Between folds, chill the dough in the fridge for at least 30 minutes
Butter cracked
Signs that the butter cracked
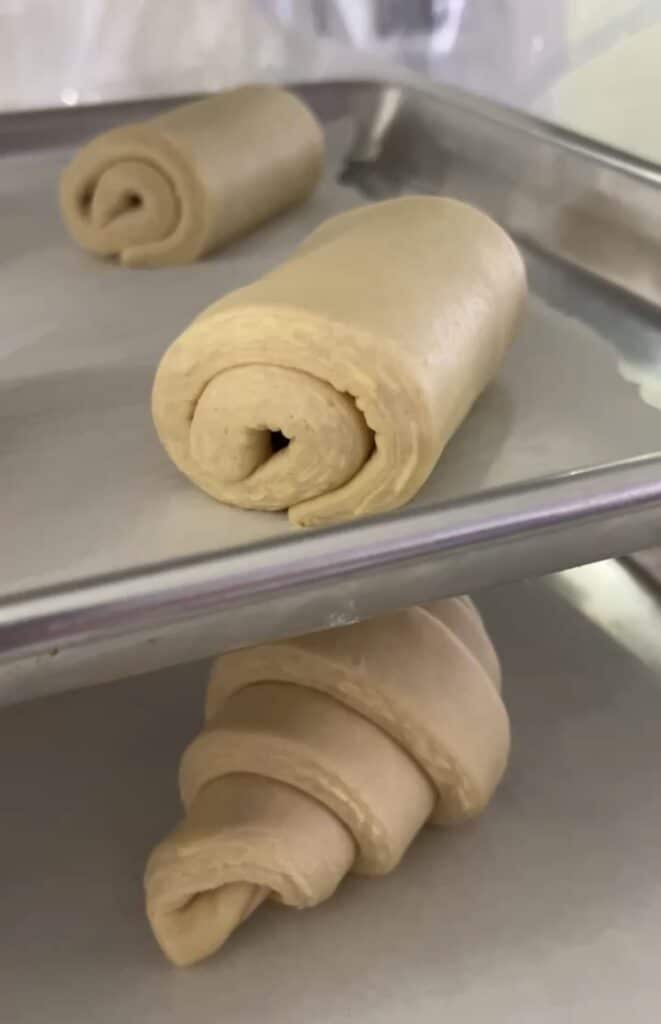
- When you cut the dough during shaping, the butter will be in cracked chunks rather than even layers
How to prevent the butter from cracking
Butter cracks when it is too cold, and / or not pliable enough.
- Make sure the butter is not too cold during lock-in. I aim for 11 – 14C, but the ideal temperature will vary depending on the butter that you are using
- Make sure the butter is pliable during lock-in. You should be able to bend it back and forth without it breaking
- Make sure the dough is not too cold when you lock in the butter. Very cold dough will make the butter seize up, and then crack. I aim for 4 – 7C
- Use a high fat (minimum 82%) butter. Butter that does not have enough fat will be brittle and harder to work with
- Between folds, make sure the dough does not get too cold. The dough should be slightly pliable before you start rolling
- If you do freeze the dough, it’s okay to let it sit at room temperature to warm up a little bit before rolling. The butter will not melt, assuming your work environment is a reasonable temperature.
Proofing Problems
For a detailed guide to proofing croissants, I recommend my Ultimate Guide to Proofing Croissants. It has information on how to tell when your croissants are perfectly proofed, making a home proofer, and maintaining the ideal temperature and humidity.
Underproofed
Signs that your croissants are underproofed
- Butter leaks and pools around the croissants during baking
- Layers after baking look thick and dry
- On the outside, the croissant still has a dome shape
- Crumb collapsed in dense, uneven patches
- Croissant feels heavy and dense relative to its size
Overproofed
Signs that your croissants are overproofed
- The surface of the croissants looks wrinkled and deflated before going in the oven
- Croissant uniformly flattens and collapses after baking, losing its dome shape
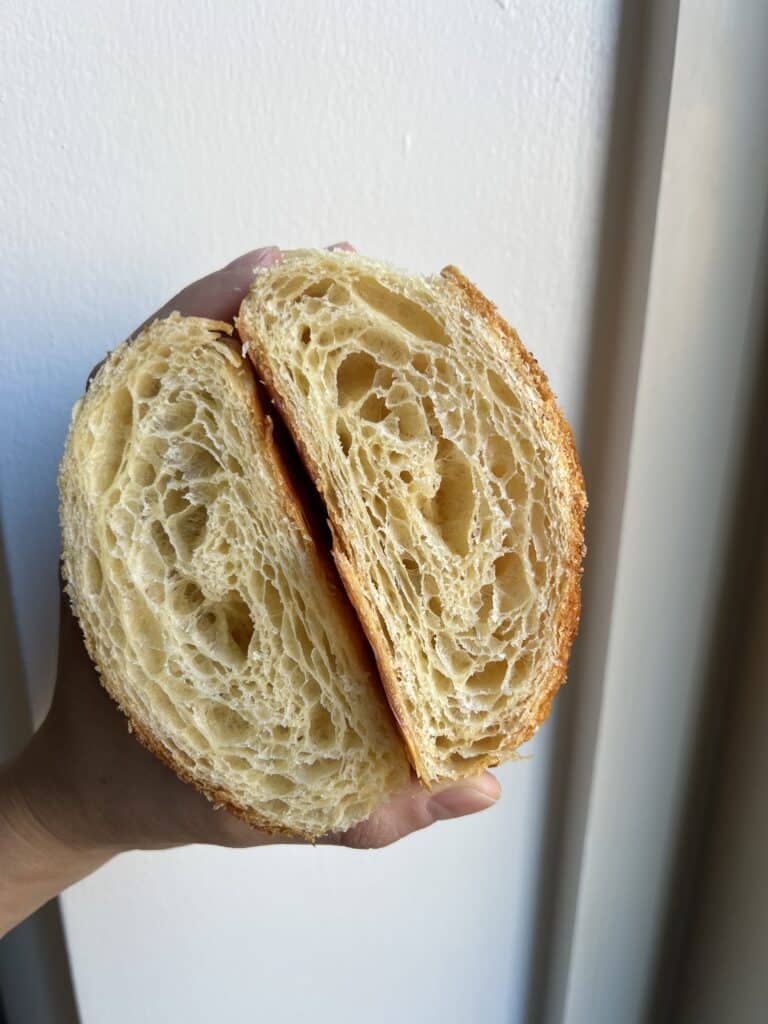
- Crumb has a honeycomb pattern, but has collapsed
How to fix proofing issues
The seemingly simple solution for fixing under and overproofing is to proof for the “right” amount of time. If you don’t have a proofer, the amount of time will vary depending on the temperature and humidity of your environment. Here are signs that your croissants are well-proofed:
- They jiggle when you shake the tray. It’s not just a little jiggle, it should be a full on wobble. And even if they jiggle, they might not be fully proofed, so check for other signs as well.
- They have grown significantly in size. They should look BIG, POOFY, and SWOLLEN. If you are questioning how poofy they are, they probably need more time.
- The layers have separated. Note that the degree of separation may vary depending on your formula and shaping. Also, if your croissants are dried out you, the layers will separate even if the croissants are not fully proofed
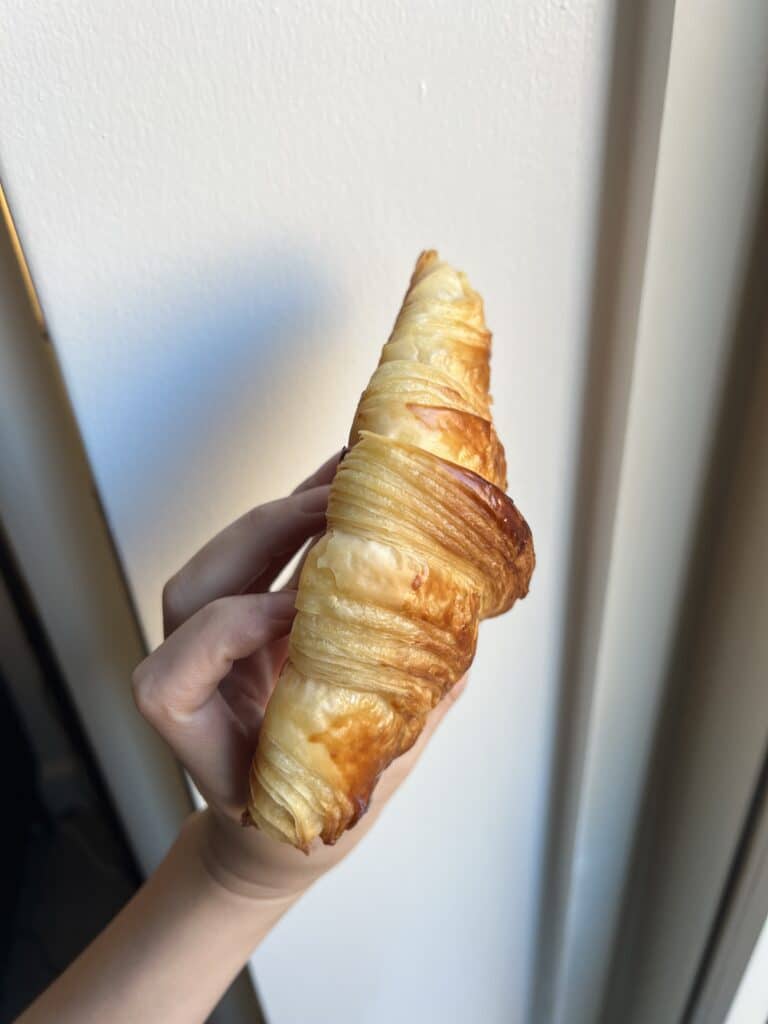
- The shoulders of the croissants should start melding into each other. If you see distinct “steps,” your croissants probably need more time. The lines between each of the shoulders should look slightly blurred.
- The tips of the croissants will start to droop. This is a sign that the gluten strength has reached its full potential, and is starting to weaken
- If you lightly poke the croissant, it should feel spongy and soft with a slight firmness, like a marshmallow or jello. You will feel small air bubbles pop beneath your finger
Temperature too high during proofing
Signs that the temperature was too high while proofing croissants
- Butter leaks and pools around the croissants during proofing
- The crumb and layers have lost definition
How to prevent too high temperature during proofing
- Monitor the temperature of your proofing environment
- Keep the temperature around 26 – 27C (80F). Around 32C, the butter will start to melt
Dough Problems
In my experience, problems with your base dough tend to be more nuanced and require more trial and error than lamination or proofing problems. It will depend on a lot of factors – your environment, the type of flour you have available, the type of machinery you’re using to mix, etc.
Dough is too weak
Signs that your croissant dough is too weak

- Dough tears during final proofing
- Dough shrinks during sheeting, even if it is kept very cold
- Before the croissants are fully proofed, they will start to collapse and flatten out
- Crumb is both underproofed and flattened out at the same time
- Crumb lacks definition, even if the lamination and proofing was done well
How to fix dough that is too weak
These factors interplay with each other, so you may need to change, one, multiple, or all of these factors. Changing one will also affect the others. For example, a higher protein flour typically also requires a relatively higher hydration.
- Mix for longer, until full window pane
- Use a stronger, higher protein flour
- Decrease the hydration of the dough
- Decrease the fat content of the dough
Dough has too much fat
Signs that your croissants have too much fat
This can be in the dough, or as a % of laminating butter
- Croissant flattens out during proofing and baking
- Croissant has a matte, evenly brown color
- Croissant is greasy and crispy, as though it has been deep fried
How to fix dough that has too much fat
- Decrease the amount of fat used in the dough
- Decrease the amount of butter used in lamination
- Increase the strength of the dough so it can support a higher fat content
Dough lacks extensibility

Signs that your croissant dough lacks extensibility
- Dough feels very stiff and tight during sheeting, refuse to stretch out
- Crumb has large air bubbles, even if the lamination and proofing was done well
- This is because the gluten is unable to expand during baking, so the honeycomb structure breaks and creates large air pockets
How to increase dough extensibility
- Use a weaker, lower protein flour
- Increase the hydration of the dough
- Increases the fat content of the dough
- Rest the dough for longer between folds
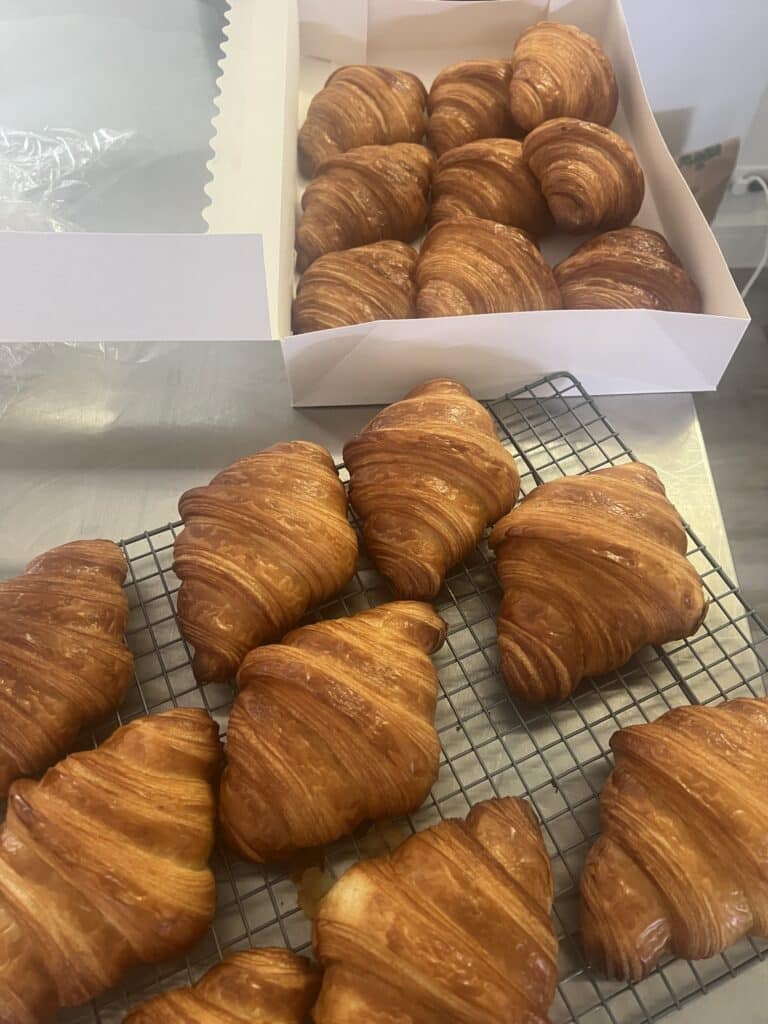
Baking Problems
Baking problems tend to be less common in my experience. I would first rule out issues with lamination, proofing, and dough mixing.
Oven temperature is too high
Signs that your oven temperature is too high, or your convection is too strong
- Outside browns too quickly while the inside of the croissant is uncooked
- The outer crumb is extremely open, but the inside is very dense
- this happens because the crust of the croissant sets too quickly, and the center of the croissant is unable to expand
- If you have poor lamination or proofing, the crumb can look similar. So please rule out lamination and proofing as issues first.