
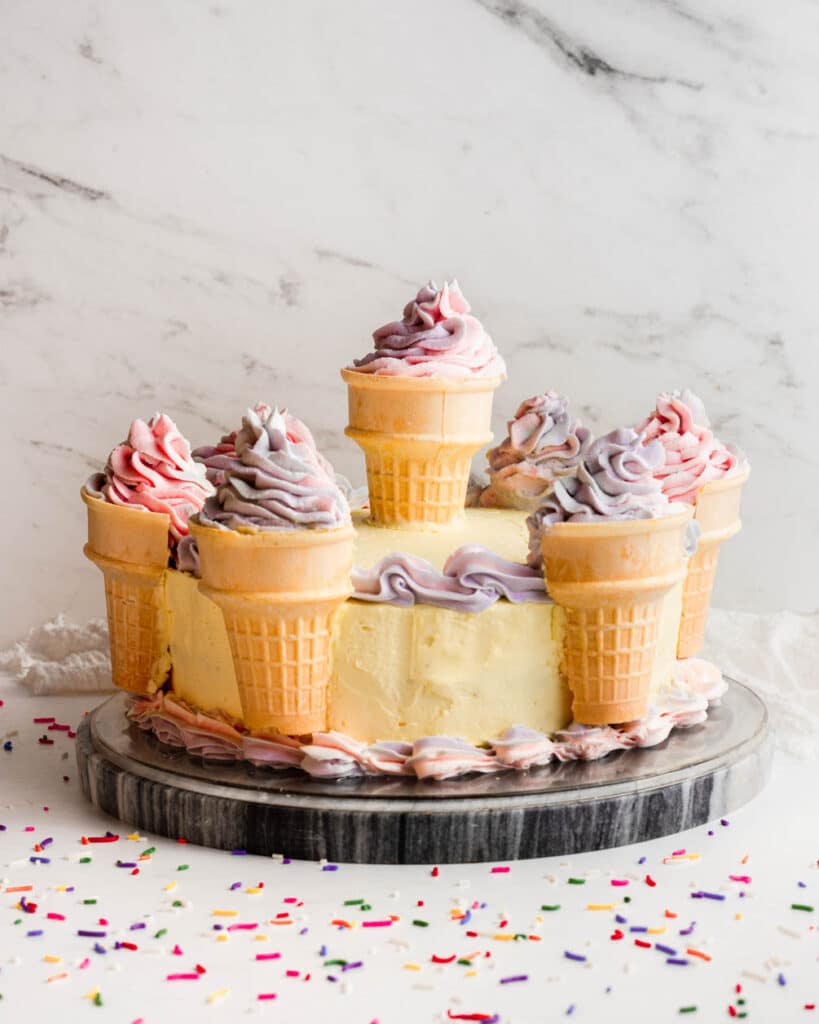
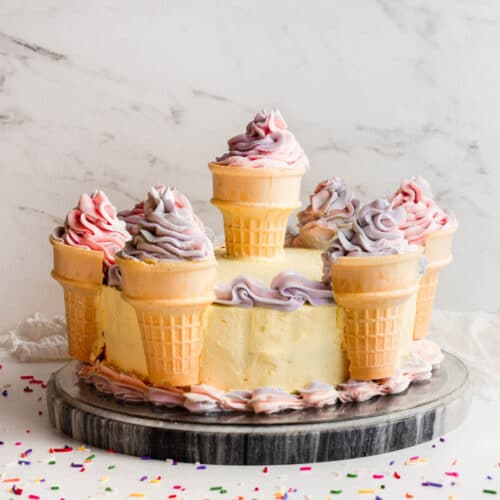
This adorable funfetti cake is decorated with whipped cream and frosting “ice cream” cones for a festive treat. Vanilla butter cream and stabilized whipped cream create tasty decorations that will keep their shape.
I recently made this fun and festive ice cream cone cake for my niece’s second birthday. Last year I made her a sugar free rainbow crepe cake. This year she’s allowed to have some sugar, so I was able to go all out.
She wanted a “yellow” cake with lots of “ice cream” decorations, so I thought a ring of whipped cream cones would be a fun way to answer her creative brief.
The cake turned out so fun, and my niece loved peeling off the cones and licking off all the whipped cream. This post is less of a recipe and more of a decorating guide to help you replicate your own cake!
What you’ll need to decorate an ice cream cone cake
A couple of tools will help you create a beautiful cake:
- Offset spatula to help make perfectly smooth icing
- Piping tips for the cake trim and ice cream cones. I use Wilton 1M tip for the trim, and the Wilton 2D tip for the ice cream swirl.
- Food dye of your choice. I use Wilton’s gel food dyes in lemon yellow, violet, and pink.
We’ll make 2 different types of icing to decorate the cake:
- Pure vanilla buttercream for covering and layering the cake, along with the trim. This buttercream is made with butter, sugar, vanilla, and heavy cream. It’s important to use the full amount of powdered sugar to avoid melting at room temperature.
- Stabilized whipped cream for piping the ice cream cones. You can use buttercream as well, but I personally find whipped cream to be easier to eat on its own because it’s less sweet. Unlike regular whipped cream, stabilized whipped cream has gelatin added, which helps it firmly hold its shape. It has much less sugar than buttercream, which my family definitely appreciates.
Tips for perfect icing
- Make sure your cake is 100% cooled before icing. Otherwise the icing will melt.
- Put a generous amount of buttercream on the cones when attaching to the surface of the cake. This helps keep them from falling off as the icing warms. You can always smooth out any excess icing with your fingers.
- Fill the cones 100% full with whip or icing before piping on the swirl. If there are any gaps, the top ice cream swirl could start sinking into the cone.
- Chill as quickly as possible after decorating. This helps set the icing.
The cake itself is made using the Funfetti layer cake recipe from Sally’s Baking Addiction: https://sallysbakingaddiction.com/funfetti-layer-cake/
Ice cream cone cake
Equipment
- Hand or stand mixer
- Offset spatula
- Open star piping tip (Wilton 1M)
- Closed star piping tip (Wilton 2D)
- Piping bags
- Food dye of your choice
Ingredients
- 3 9 inch wide funfetti cakes about 1 inch high
- 4 cake ice cream cones
Buttercream
- 2 1/4 cups (500g) salted butter, room temperature
- 7 1/4 cups (900g) powdered sugar
- 1/3 cup (80g) heavy cream
- 1 1/2 tbsp vanilla extract
- food dye of your choice
Stabilized whipped cream
- 1 tsp gelatin powder
- 1 1/2 tbsp cold water
- 1 tbsp heavy whipping cream
- 1 1/2 cups (360g) heavy whipping cream
- 3 tbsp (30g) powdered sugar
- 1 tsp vanilla extract
- food dye of your choice
Instructions
Make the buttercream
- In a large bowl using a hand mixer or stand mixer fitted with a paddle attachment, beat the butter on medium speed until creamy. Sift in the powdered sugar and add the heavy cream and vanilla extract. Mix on low until just incorporated, then mix on high for 3 minutes until smooth. Add a little more cream if it's too stiff, or more sugar if it's too runny.
- Split out 1/3 of the buttercream and set aside. With the remaining buttercream, add a few drops of yellow food color.
- Take the undyed butter cream and split into two bowls. Dye one bowl pastel pink and the other bowl pastel purple.
Assemble the cake and frost with buttercream
- Make sure the cakes are level. If not, slice off the dome with a serrated knife or cake slicer. Place one cake layer on your cake stand. Cover the top evenly with your yellow frosting, then place the second layer. Cover the top evenly with frosting, then place the third layer. Cover the top and sides of the cake with frosting.
- Place a 1/2 inch open star tip in a piping bag. Fill one side of the bag with pink frosting, and the other side with purple frosting. This will create a two-toned swirl. Pipe around the top and bottom edges of the cake to create a decorative trim.
Attach the ice cream cones
- Use a box cutter or sharp knife to cut 3 of the ice cream cones in half. Spread or pipe a thin layer of yellow buttercream on the edges and press each half into the side of the cake, above the bottom decorative trim. Make sure to space them evenly around the cake.
- Take the last ice cream cone and cut off the bottom 1 inch. Press it into the middle of the cake. For a fun surprise, fill the middle of the cone with rainbow sprinkles.
Make the stabilized whipped cream.
- Place the cake in the fridge to chill while you make the whipped cream
- Place 1 1/2 tbsp of cold water in a small bowl. Sprinkle the top with gelatin powder. Wait 5 minutes until the gelatin blooms.
- Microwave the gelatin for 5 seconds until it melts and there are no more grains. If it's not melted place in microwave for 3 – 5 more seconds.
- Add 1 tbsp of whipped cream to the gelatin and mix. If it hardens, place in microwave for another 5 seconds until liquid again.
- Place the whipped cream, powdered sugar, and vanilla extract in a large bowl. Use a hand mixer of stand mixer fitted with a whisk attachment, beat on medium speed until soft peaks form. Pour in the gelatin mixture. Whisk on medium-high speed until stiff peaks form. Divide in half and fold in pink dye in one half, and purple dye in the other half.
- Place a 1/2 inch closed star tip in a piping bag. Fill one side of the bag with pink whipped cream, and the other side with purple whipped cream.
Pipe the ice cream cones
- Fill each ice cream cone half with whipped cream and then pipe an ice cream-like swirl on top.
- Pipe a whipped cream swirl onto the ice cream cone in the middle of the cake.
- Chill in the fridge until time to serve.
Notes
- Cake ice cream cones are the wafer-style ones with a flat rather than pointed bottom.
Olivia loved this cake for her second birthday. As a mom I appreciated that the whipped cream was lower in sugar (but still equally delicious and creamy for the adults at the party too!). Olivia thought it was yummier than real ice cream, and the presentation was a 5 out of 5.