
Kouign amann are flaky pastries made using a caramelized pastry dough. I love to fill mine with delicious fillings such as mochi, cookie butter, nutella, and jam!
This post may contain affiliate links. This means I may bet a small commission if you purchase through these links, at no additional cost to you.
There’s nothing quite like biting into a delicious, flaky, crunchy pastry fresh from the oven. Even better if that pastry is a kouign amann (pronounced “queen amann”), which has sugar sprinkled between each layer to create a delicious caramelization.
Granted, kouign amann are not the easiest baked good to make at home, but the result is well worth the effort. Before you know it, you’ll be an expert in making laminated pastries at home!
What is a kouign amann?
A kouign amann is a flaky pastry from Brittany, France that is similar to a croissant. It made from pastry dough with sugar sprinkled between the layers. When baked, the sugar caramelizes and adds delicious flavor to the pastry.
How to make laminated pastry dough
First off, what even is laminated pastry dough? What does “laminating” mean? Laminating refers to the process of creating layers of butter and dough in the pastry. When you bake these layers, the butter melts, creates pockets of steam, and causes the pastry to “puff” and create the signature flakiness of baked goods such as croissants.
Typically you follow these high level steps when laminating:
- Wrap a square of butter into dough
- Roll into a rectangle
- Fold the rectangle to create 3 layers
- Do this 3 times in total to create 27 layers in all
When making kouign amann specifically, you will do a 4th fold and add granulated sugar before folding.
Overall tips for making puff pastry
The key to great puff pastry is clearly defined layers of butter, dough, butter, dough, etc. Here are my overall tips to getting those magical layers:
- Keep things cool! It’s very important to keep your working environment and your dough cool to prevent the butter from melting into the dough. Always chill your dough in the fridge for 30 minutes between each turn.
- Work quickly. You want to roll out your dough quickly and firmly to prevent the butter from warming up.
- Measure obsessively. You want to follow the dimensions closely in this recipe, since it ensures that each layer is at the correct thickness. When rolling out a rectangle, you also want sharp corners to ensure that all parts of the dough have the same number of layers. No ovular rectangles here!
- Keep the butter and dough at the same temperature. This is the most important for the first turn. You want the butter to be firm, but pliable. If it’s stone cold, when you try and laminate the butter and dough together the butter will shatter. This creates annoying bumps in your dough.
Having the right tools for laminating pastry
These are the tools I have on hand to make the job easier:
- French rolling pin. A French rolling pin is made of a single piece of wood and has tapered edges. Compared to a traditional rolling pin, a French rolling pin helps me apply pressure more easily to different parts of the dough. This helps me control the shape, dimensions, and thickness of the dough more easily. I use this rolling pin from Mano on Amazon.
- Measuring tape. Keeping a measuring tape handy means you can quickly measure check on the dimensions of your dough.
- Pizza cutter. A pizza cutter helps you trim off the ends of the dough and quickly divide into pieces. A sharp knife works as well, but a pizza cutter is definitely more effective!
Making the block of butter
Traditionally, you make the square of butter by bashing cold butter with a rolling pin until it’s the desired shape. Personally, this has never worked for me because I can’t get the butter to properly smash together. Instead, I use this method:
- Draw a 5 inch by 5 inch square onto a piece of parchment paper
- Beat softened butter with a stand or hand mixer until creamy
- Spread the butter evenly onto the square and place into the fridge for 20 – 30 minutes before using
It’s so much easier to get an even layer of butter this way!
Shaping the kouign amann
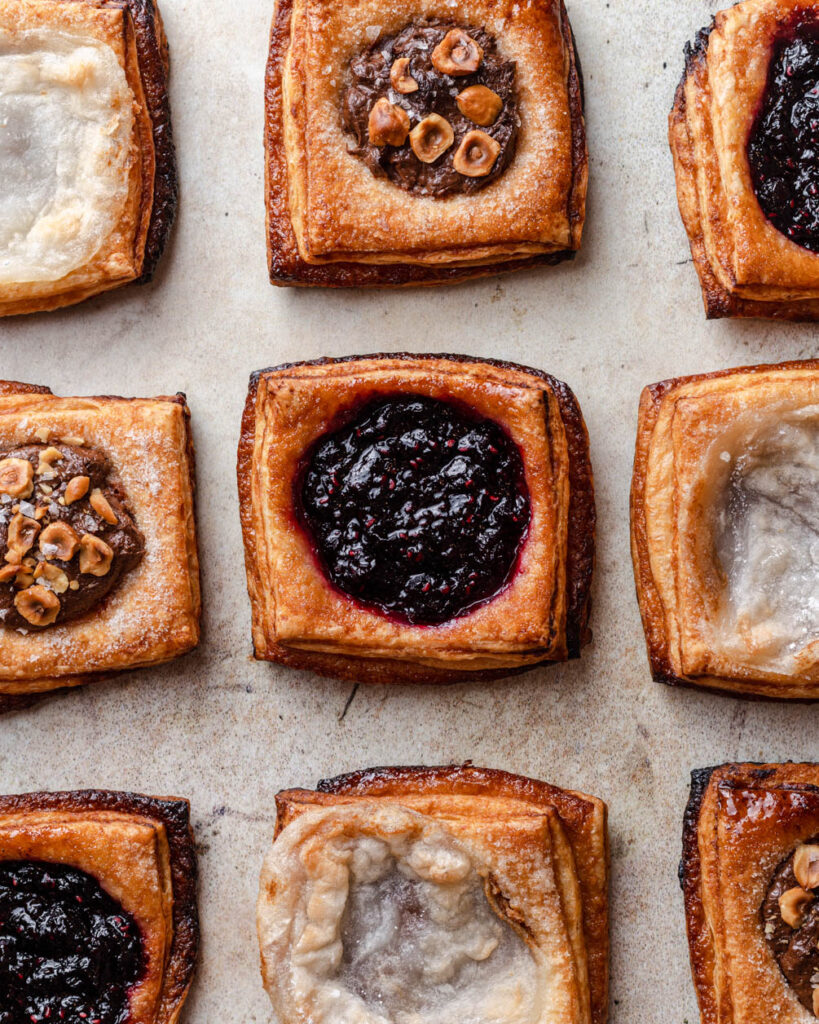
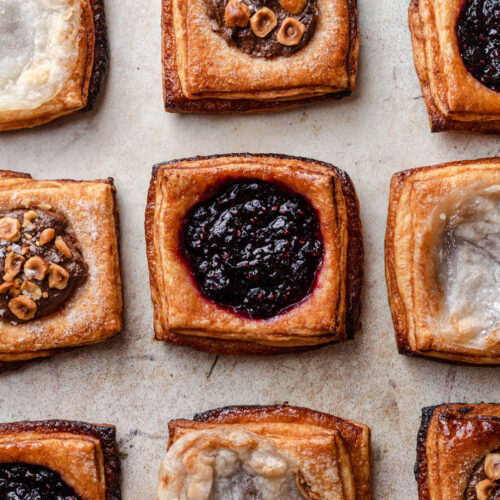
The traditional way of shaping kougin amann invovles folding the squares of dough into pastry circles to create the iconic “clover” shape. In this recipe, I choose to just leave the pastry as squares and spoon the toppings onto the center. That way, you don’t need a muffin tin or pastry circles for shaping.
Best fillings for kouign amann
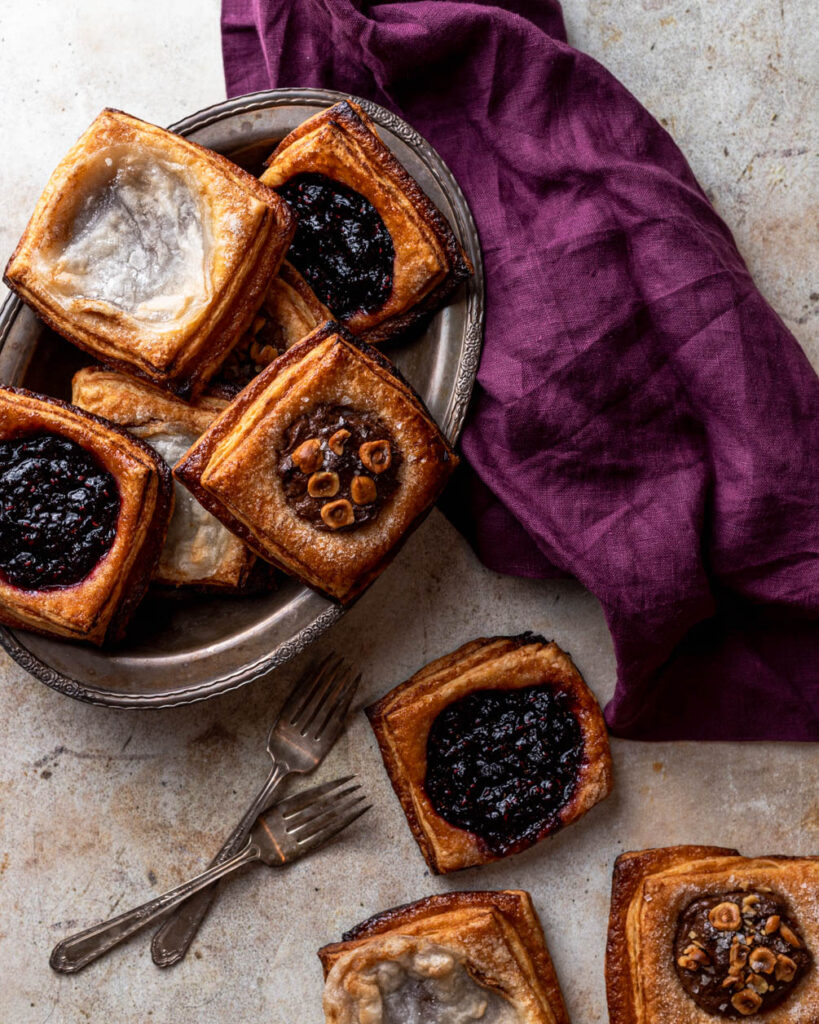
My favorite part of making kouign amann are all the fun fillings and flavors you can add! These are some of my favorites:
- Mochi & cookie butter
- Nutella with hazelnuts and sea salt
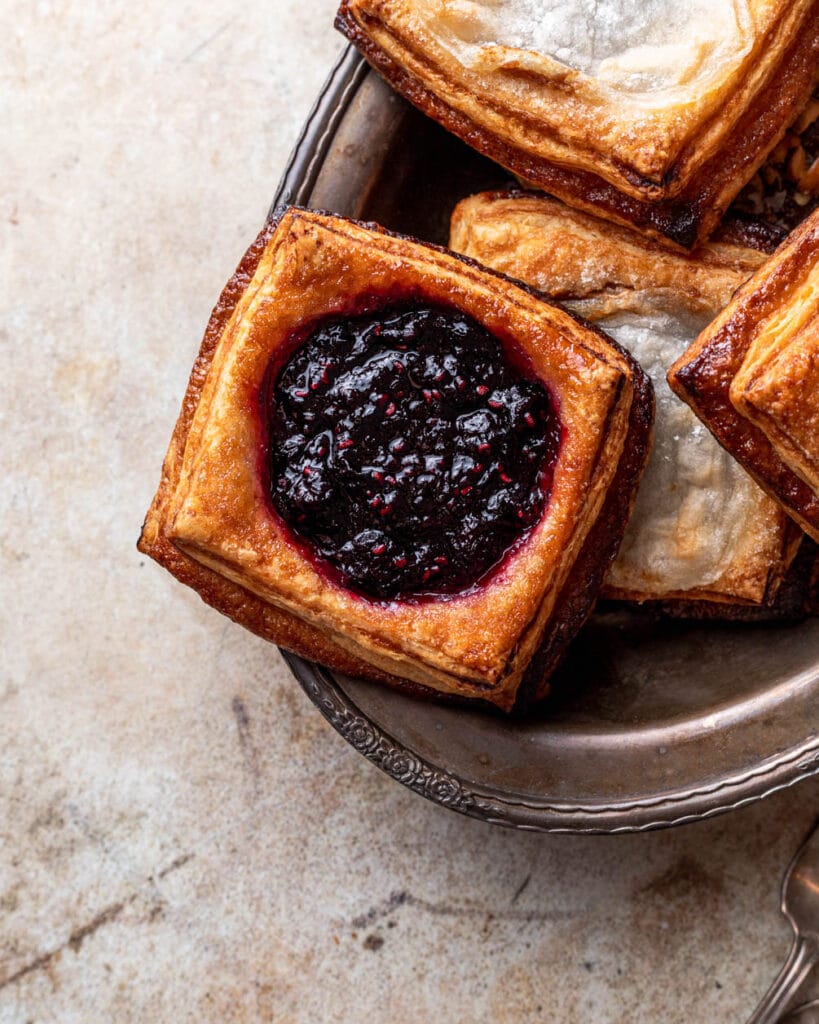
- Homemade mixed berry jam
The mochi one is super fun because it adds a chewy texture that goes so well with the crispiness of the pastry. I’ve included the recipe for this filling as well.
Overall, the end to end process for kouign amann takes about 3 hours, but when you bite into that crunchy pastry it’ll all feel worth it. Or, you can go to your local French bakery and buy one… I won’t judge!
If you make this recipe, please let me know! I always love to see what my readers are baking. You can comment below or tag me on Instagram @halicopteraway.
Kouign amann
Equipment
- medium mixing bowl
- Hand or stand mixer
- Rolling Pin
- Baking sheet
- Parchment paper
Ingredients
Pastry dough
- 200 g (1 cup) warm water
- 1.5 tsp instant or active dry yeast
- 300 g (2.5 cups) all purpose flour
- 1 tsp salt
- 25 g (2 tbsp) unsalted butter, melted
- 250 g (18 tbsp) unsalted butter, softened
- 100 g (1/2 cup) granulated sugar
Mochi & cookie butter filling (for 4 pastries – triple if adding to the whole batch)
- 4 tbsp cookie butter (I use Lotus Biscoff)
- 45 g (1/3 cup) glutinous rice flour
- 25 g (2 tbsp) granulated sugar
- 90 g (1/2 cup) water
- corn starch, for sprinkling
Instructions
Make the dough
- In a mixing bowl, add the warm water and yeast. Mix together and let sit for 5 – 10 minutes until frothy. Make sure that the water is warm too the touch, but not hot – otherwise, it might kill your yeast.
- Add the melted butter, all purpose flour, and salt to the bowl. Mix until a shaggy dough forms. Turn onto the countertop and knead for 10 – 15 minutes until smooth. You can also use a stand mixer and knead on medium speed for about 6-8 minutes. Form into a ball and place into an oiled bowl. Let rest for about 1 hour until doubled in size.
Prepare the butter
- While you wait for the dough to rise, prepare the butter. Measure out a 5 inch by 5 inch square on a sheet of parchment paper. Set aside.
- Add the softened butter into the bowl of a stand mixer and beat with a paddle attachment on medium speed until smooth and creamy.
- Spread the softened butter onto the parchment paper square, taking care to smooth out any air bubbles and level out the surface. The square should be about 1/2 inch thick.
- Wrap and place the square of butter in the fridge for 20 – 30 minutes to firm up before using.
Laminate the dough
- After the dough has risen, roll out into an 8 inch by 8 inch square. It's important that the corners of the square are clearly defined.
- Place the square of butter diagonally in the center of the square of the dough. The corners of the butter should point towards the sides of the dough. At this point, the butter should be firm but pliable. If it is rock hard, let is soften for a few minutes before using.
- Fold each corner of the dough over the butter and pinch the seams together. It should look like an envelope.
- Working quickly, roll the dough into an 18 inch by 6 inch rectangle. Be very precise with these dimensions. Fold the top third of the rectangle towards the bottom. Then fold the bottom third of the rectangle over so that you now have 3 layers of dough. Wrap in cling wrap and place in the fridge for 30 minutes.
- Repeat this process 2 more times so that you have laminated the dough 3 times in total. Be sure to chill the dough in the fridge for 30 minutes between each turn.
- Roll out the dough again into an 18 inch by 6 inch rectangle. This will be the 4th time that you do this. Sprinkle the surface of the dough with about 3/4 of the granulated sugar, saving some to sprinkle on the top of the pastry later. Then, fold the top third of the rectangle towards the bottom, and the bottom third over. Now, the pastry layers have sugar in between. Place in the fridge for 15 – 30 minutes.
Shape & bake the pastries
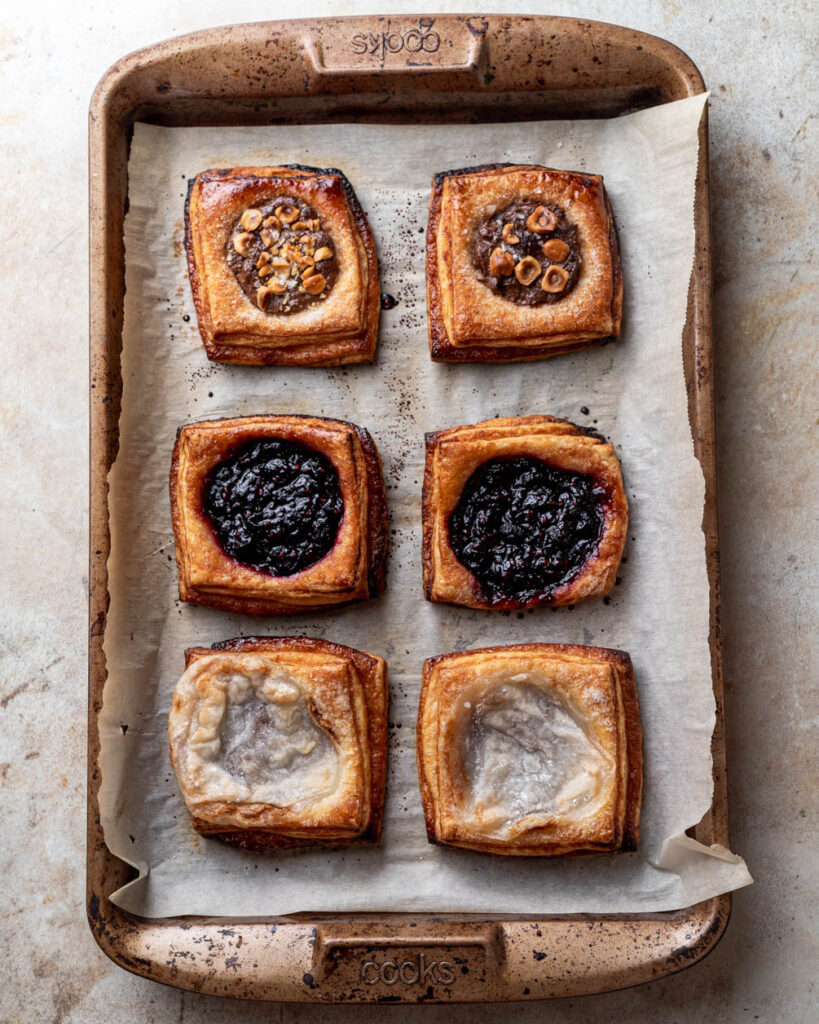
- Roll the dough into a 16 by 12 inch rectangle. Sprinkle the surface of the dough with the remaining sugar. Trim off the edges and then divide into 12 even squares.
- Place the squares on a baking sheet spaced 1 inch apart. Let proof for 30 minutes until puffy. You should see the layers start to separate.
- Towards the end of the proof, preheat the oven to 425°F / 220°C. Top the center of each rectangle with 1 – 2 tbsp of your preferred filling. To add mochi, see the section for "mochi & cookie butter" below.
- Place in the middle rack and bake for 25 – 30 minutes. At the 15 minute mark, check the pastries. If they're browning too quickly, tent with aluminum foil.
- Remove from the oven and enjoy!
Mochi & cookie butter filling
- I usually make the mochi while I wait for the dough to chill. In a small, microwave-safe bowl mix together the glutinous rice flour, sugar, and water. Microwave for 15 seconds, then give the ingredients a stir. Microwave for another 15 seconds, then stir again. Microwave for a final 15 seconds until the mochi is cooked. It should be translucent and solid. Let cool before handling.
- Sprinkle the mochi was corn starch and divide into 4 equal pieces.
- After shaping the kouign amann, spoon 1 tbsp of cookie butter into the center of the square. Cover with a piece of mochi.
Notes
- Butter temperature: When you first start laminating, you want the butter to be firm but pliable, not stone cold. Throughout the rest of the lamination process, be sure to chill the dough for 30 minutes between each turn to give the butter a chance to firm up. If you ever feel the butter start to melt, pop the dough back in the fridge before continuing lamination.
- Proofing: When proofing, you want the pastries to become puffy and should start seeing clear definition in the layers.
- Fillings: Other than mochi & cookie butter, I also like to use Nutella, jams, custards, or curds.