
You don’t need a fancy or expensive setup to take drool-worthy food photographs. With just $20, you’ll be well on your way to taking beautiful pictures of your creations!
When I first started blogging, I would simply point and shoot with my phone camera. I didn’t want to deal with the expense of purchasing a fancy camera and lighting tools. I also didn’t want the hassle of having to style my food. After all, shouldn’t the quality of my recipes speak for themselves?
Here’s the truth – when it comes to running a blog, how your food looks matters just as much as how it tastes. A reader experiences food only through images. That’s why your pictures need to be so captivating that a reader can just eat it with their eyes.
Luckily, it’s definitely possible to take attractive food photos with minimal investment and without any fancy equipment. Of course, food photography takes practice, and I’m definitely still improving!
How to take beautiful food photos on a budget
-
Get familiar with your phone camera
Phones these days truly have phenomenal camera quality (this is coming from someone who had a flip phone until college). While a DSLR will outmatch an iPhone, phone photography is great for 2 main reasons: 1) price and 2) easy learning curve. All you have to do is point, tap, and press. Sometimes you don’t even have to tap.
I shot most of my photos on an iPhone 8, and recently switched to an iPhone 10. I haven’t found a huge difference in quality, but I enjoy Portrait Mode on the 10. -
Find a quality source of lighting
The biggest downfall to phone photography is poor lighting. Here is what you should look for in a good light source: neutral, white light and gentle, distributed light. White light helps you avoid weird color tones on your food, and distributed light helps you avoid glare and shadows. For a beginner photographer, you can’t beat natural light from the sun. A sun-lit room will do just fine, but skip direct sunlight, as it will be too harsh. -
Download Adobe Lightroom for Mobile
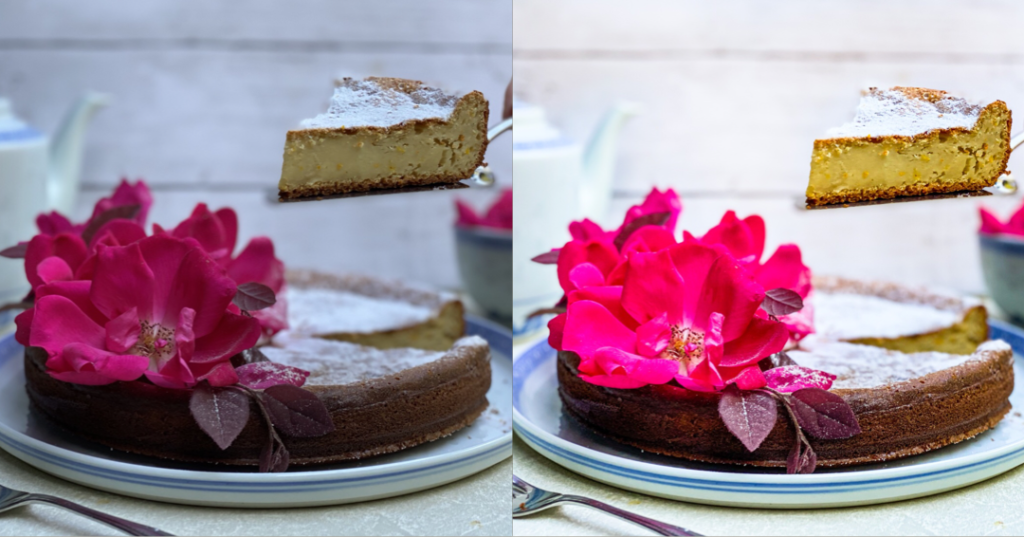

Before and after Adobe Lightroom magic
An editing app on your phone is critical, especially for phone photography. It will save you a lot of grief and will truly bring your photos to life. Adobe Lightroom is one of the best free photo editing apps on Mobile, hands down. It is so easy to learn and will immediately perk up your photo. I love it so much I pay the $4.99 a month for the premium version, which gives me access to additional editing tools. Here are how I love to use Adobe Lightroom:
- Light curve: Helps immediately brighten and adjust contrast
- White balance: I can’t always achieve perfect neutral lighting, so the temperature and tone adjusting are critical
- Effects: Helps bring that sharpness that can be lacking in phone photography
- Select edits (premium): Helps me adjust for uneven lighting and to bring certain parts of the image into stronger focus
-
Make your own photo backdrops
Have you wondered why every food blogger seems to have a cute wooden table, glossy marble countertop, or both? Chances are they probably don’t, but what they do have is a set of photo backdrops. Unfortunately, a single backdrop can run anywhere from $50 – $150+, and you usually need 2 backdrops if you’re shooting at an angle (one to put under your food and one to put behind your food).
To save some $$$, you can easily DIY your own backdrops using large sheets of cardboard, posterboard, or wood plus some adhesive wallpaper. Here’s how:
- Find a sturdy board that is at least 2′ x 2′. The sturdiness will help it stand straight and the size will allow you to shoot from multiple angles.
- Purchase adhesive wallpaper that is matte and semi-waterproof. Shiny wallpaper will create glare in your photos, and having something waterproof helps so much with clean up. I’m always spilling sauces and fillings, so being able to wipe off a board is key. I currently love this distressed brown wood pattern and this rustic white wood pattern.
- Clean off your board and measure and cut your wallpaper to fit. Peel off the backing and carefully stick on your board, making sure to align the edges and smooth away any bumps. You can even put two different backgrounds on the same board, one on each side.
-
Work those angles
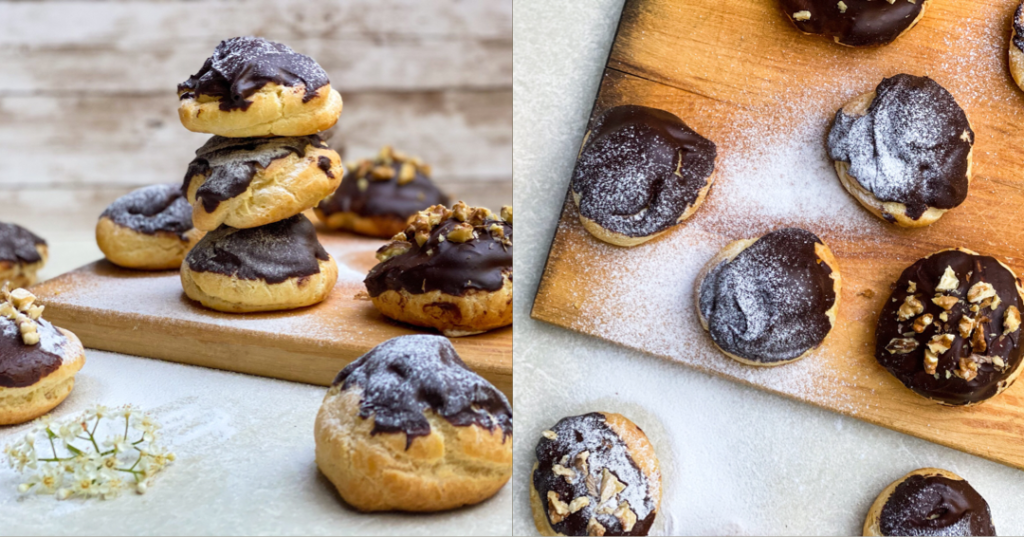
Same cream puffs, different angles
Shooting from various angles helps your viewers feel like their engaging with the food in different ways. Try an overhead shot, straight-on shot, or a 3/4 angled shot, and match your food styling to the angle. For example, an overhead shot would work with a tray of cookies, but a straight-on shot could capture the beauty of a cookie stack. Working different angles keeps me creative and prevents my photography from getting dull and repetitive. -
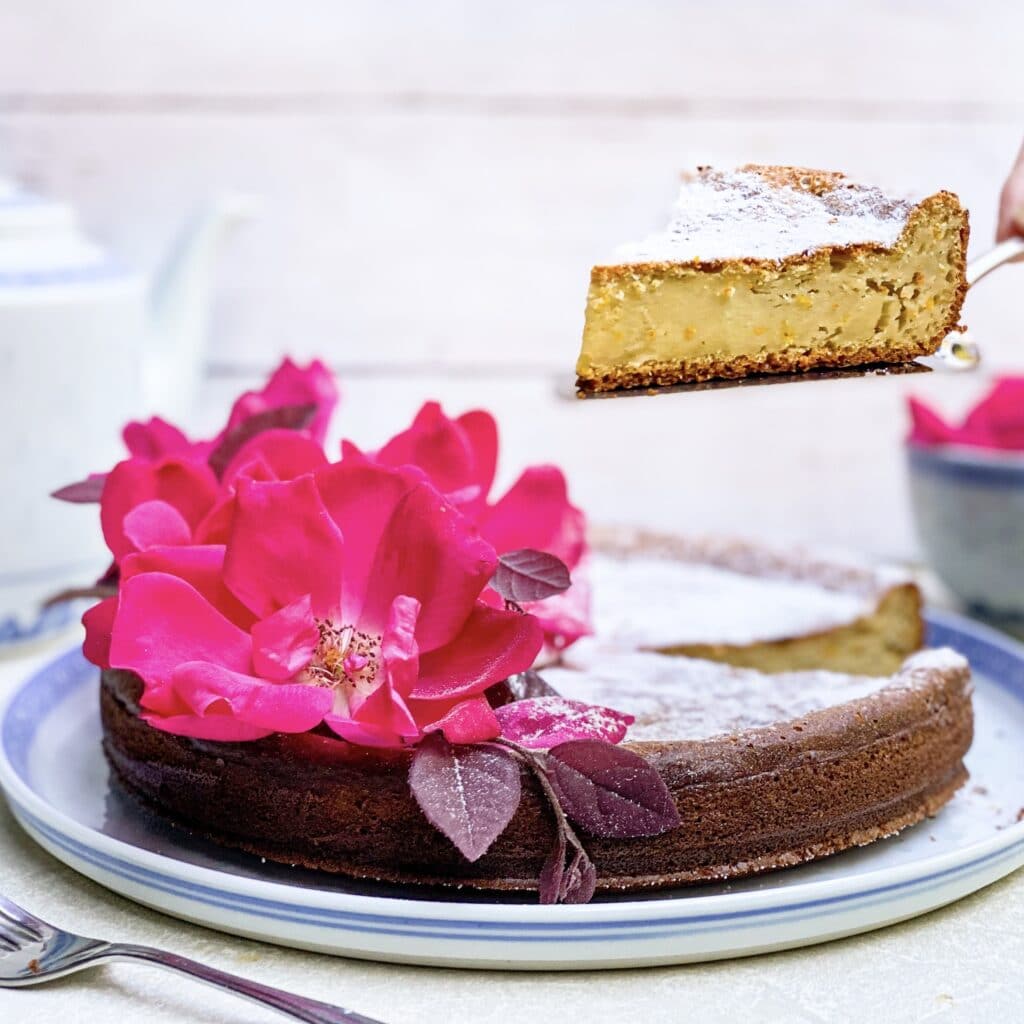
Play around with props
This is where you can really bring in your own personality. I try to convey a story or mood in every food photo, and props are important tools to create this message. I use just enough to keep my photos lively but try to avoid clutter. If you’re not a fan of flowers or trinkets, a prop can be as simple as a well-designed pie dish or a spoonful of peanut butter.