
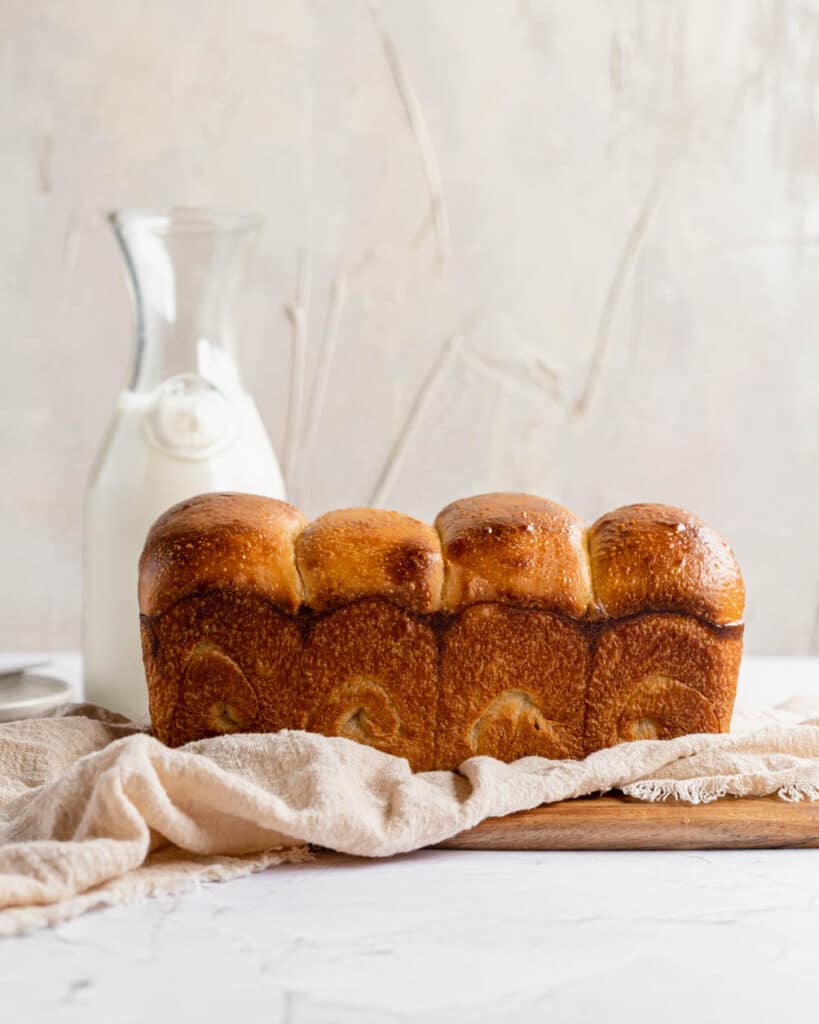
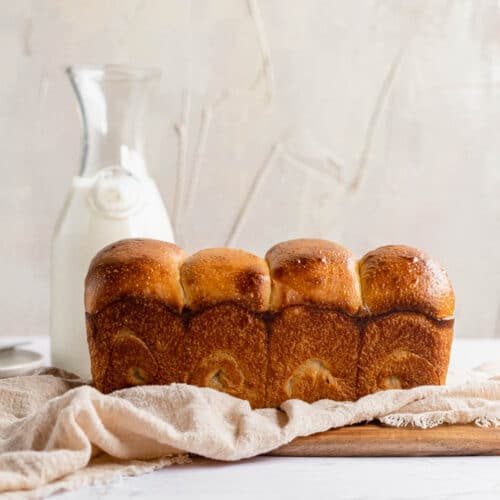
This fluffy sourdough milk bread is made using the tangzhong method to create the softest white bread loaf. A long, slow rise creates a rich, buttery flavor, and a no-knead method is perfect for making this bread completely by hand!
Sourdough Japanese milk bread takes the incredible fluffiness of milk bread and combines it with the distinctive flavor of sourdough – and the result is pure magic. Normally when I tell people I bake a lot of sourdough bread, they think of rustic artisan loaves with a crunchy crust and chewy center. And don’t get me wrong, I LOVE a good artisan loaf.
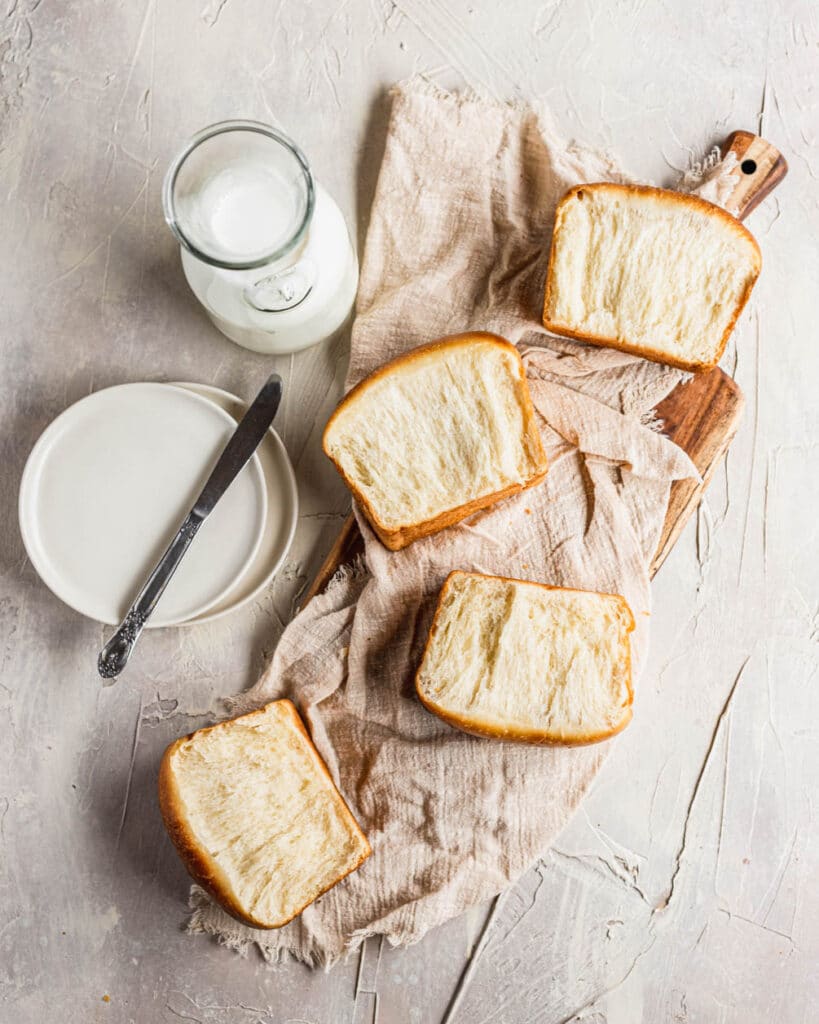
But sourdough is actually super versatile and can be used to make a soft white bread as well – as there’s nothing softer and more melt-in-your-mouth than this Japanese milk bread. I’ve spent months perfecting my recipe and I can’t wait to share this simple no-knead technique with you!
If you want to try milk bread but don’t want to mess with sourdough, then try out my Japanese milk bread by hand recipe, which uses commercial yeast. But if you’re a sourdough lover then stick around – we’re going to make the fluffiest loaf of sourdough you’ve ever seen.
What makes this the best sourdough milk bread recipe
A couple of techniques help make this recipe shine for the absolute floofiest loaf.
First, this recipe is 100% no-knead. We let the naturally long fermentation process help build the gluten so that the process is largely hands off. For anyone who’s every struggled with sticky milk bread dough, you can really appreciate a good no-knead recipe!
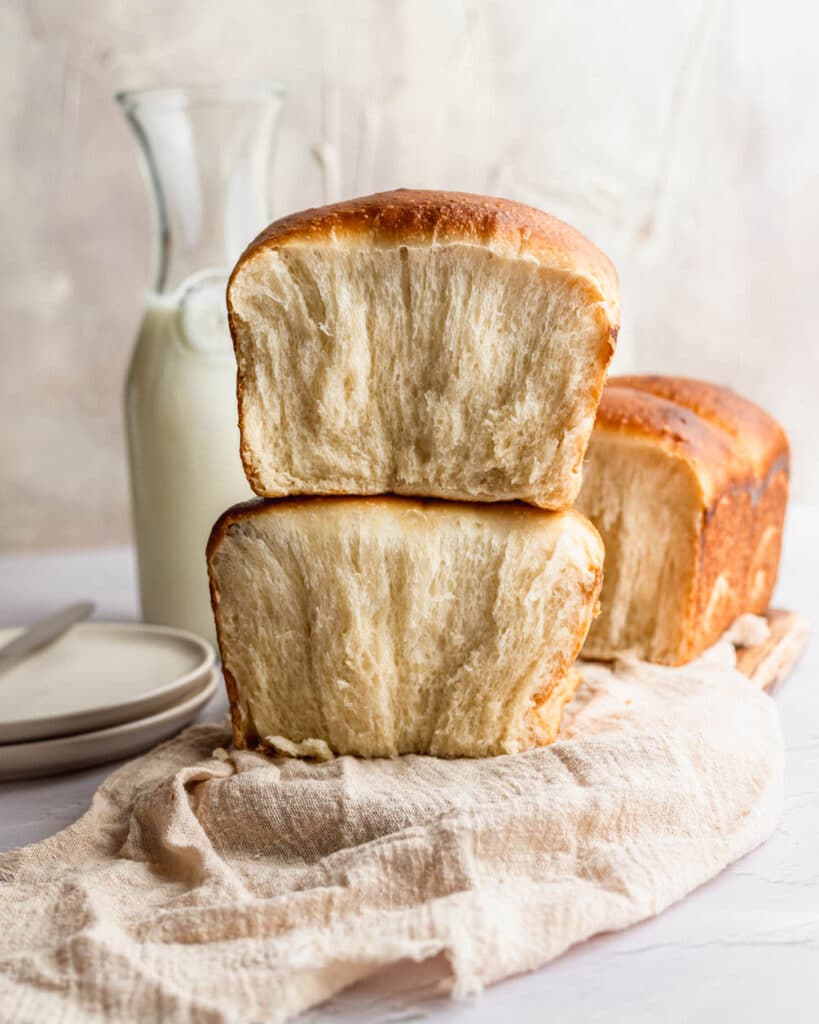
Second, we use the tangzhong method to create that cotton candy-like fluffy texture. You cook flour, milk, and water together to create a roux. This gelatinizes the starches which contributes to that incomparable texture. This process along takes a few minutes at the start of the recipe ,but has major payoffs down the road!

Tips for perfect sourdough milk bread
Like any other sourdough recipe, there’s a certain amount of variability in this recipe depending on the strength of your starter and temperature of your kitchen. If you’re a beginner sourdough baker, I recommend trying a classic loaf first before tackling this milk bread. It’ll help you get a feel for your starter and different sourdough techniques.
Here are some general tips to keep in mind as you bake this loaf:
- Make sure you have a mature starter that doubles in size after being fed within 4 – 8 hours. The rise time on this loaf is quite long, so a strong starter is crucial to make sure your loaf is not underproved. If you’re starter isn’t doubling quickly enough, keep discarding and feeding until it builds strength.
- Be patient – it’s going to take time to rise! Milk bread is an enriched loaf, meaning there’s butter, milk, and eggs added to the dough. These fats slow down the rise, and natural yeast is already a slower mover than commercial yeast. Rise time will vary depending on how warm and humid your kitchen is – I’ve had this recipe take me anywhere from 5 – 10 hours on the second proof.
- Use a food scale to measure ingredients. Precision helps for the best sourdough results, so I only provide this recipes in grams.
- Make sure your butter is at room temperature. Softened butter is important for incorporating smoothly into the dough, otherwise you may have small lumps.
My sourdough baking timeline
Because rise. times can vary, I’m providing my general timeline to help give a sense of how long this loaf will take. Of course, it’s important to keep an eye on the dough to make sure it’s not over or underproofed. Overall, this is a 2 day process but you can place the loaf back in the fridge after the second proof for up to 24 hours.
Day 1
10:00am – Mix sourdough starter with milk and bread flour
4:00pm – Make the tangzhong. Mix together all ingredients to create the dough.
4:30pm – First set of coil folds to develop gluten
5:00pm – Second set of coil folds
6:00pm – Third set of coil folds
6:45pm – Fourth set of coil folds
7:00pm – Cover and place in fridge for overnight cold retard. This helps make the dough easier to handle when shaping the next day.
Day 2
12:00pm – Divide the dough and shape. Place in a loaf tin
— Long rise time. I’ve had it rise in 5 hours in a very warm and humid environment. I’ve also had it take 10 hours during the winter. —
9:30pm – Bake for 10 minutes at 400F then reduce 350F and bake for 20 minutes. The hotter initial temperature helps create a better oven spring.
If you want a fresh loaf of bread in the morning, you can also cover and place back in the fridge to bake the next day. The cold temperatures will stall the rise.
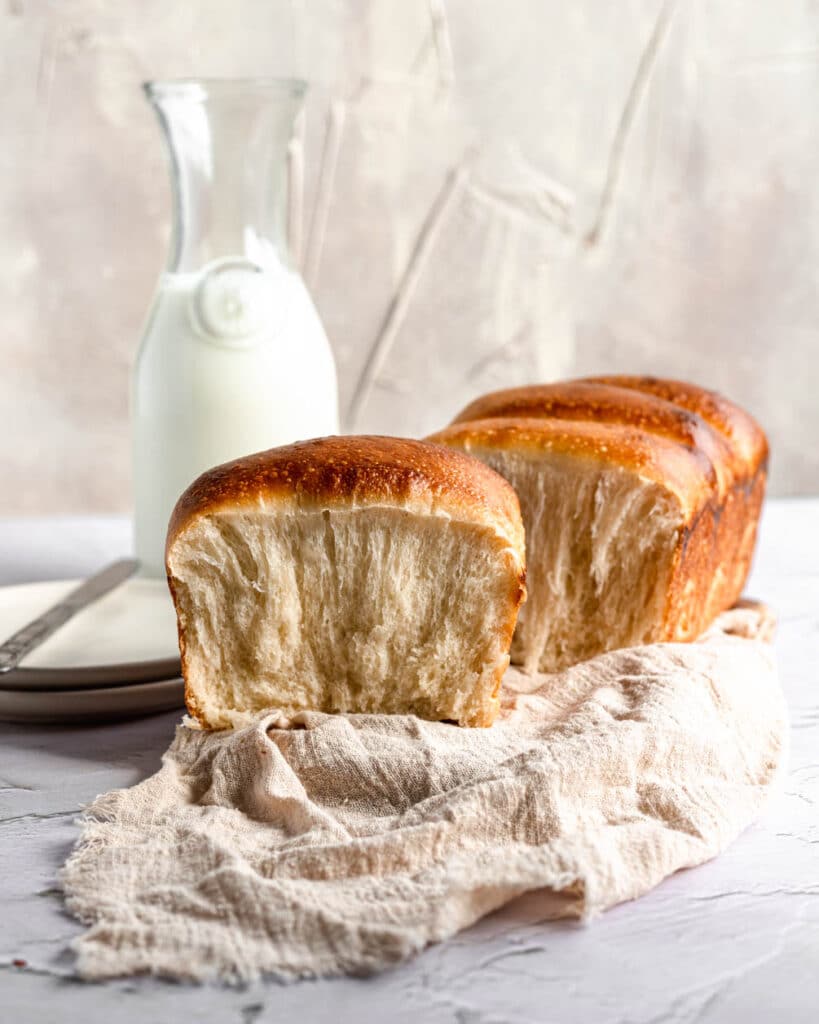
While this recipe can take a while, it’s definitely a mix it and leave it kind of recipe. And I love the super rich sourdough taste you get from the long ferment. So with all that being said, is your starter fired up and ready to go? Let’s bake some sourdough milk bread!
Other sourdough recipes I love:
If you make this recipe, please let me know! It would bring me so much joy to see your sourdough milk breads. You can comment below or tag me on Instagram @halicopteraway.
Sourdough Japanese milk bread
Equipment
- Mixing bowl
- Skillet
- Rolling Pin
- 9 x 5 inch loaf tin
Ingredients
Levain
- 30 g fed and active sourdough starter, 100% hydration
- 60 g milk, warm
- 60 g bread flour
Tangzhong
- 23 g bread flour
- 60 g water
- 60 g milk
Dough
- 275 g bread flour
- 50 g granulated sugar
- 4 g salt
- 60 g milk, warm
- 1 egg
- 60 g butter, room temperature
Egg wash
- 1 egg
- 1 tbsp milk
Instructions
Make the levain
- Mix together the sourdough starter, warm milk, and bread flour to create the levain. Cover and let rise until doubled in size. This takes about 4 – 8 hours.
Make the tangzhong
- In small skillet or pot, whisk together flour, milk, and water until smooth. Bring to simmer over medium-low heat, whisking frequently, until mixture has thickened but is still pourable. It should take 5 – 10 minutes. Your whisk should leave a mark when dragged along the bottom of the pan.
- Pour into a bowl and cover surface with plastic wrap to prevent a film from forming, and allow to cool to room temperature.
Make the dough
- In a mixing bowl, add the flour, sugar, salt, milk, egg, levain, and tangzhong. Mix until a shaggy dough forms. Use your hands to gently mix in the softened butter.
- Cover the bowl with plastic wrap and let sit for 30 – 45 minutes.
- Gently slide your hand under the middle of the dough and fold it over itself twice using the coil fold method. This helps gently develop the gluten.
- Over the next 2 to 3 hours, allow the dough to rise, performing a coil fold every 30 – 45 minutes.
- Cover the dough with plastic wrap and place in the fridge for at least 8 hours and up to 24 hours.
- Grease a baking tin. Remove the dough from the fridge and turn out onto a lightly floured surface. Divide into 4 equal pieces. For perfectly even pieces, you can weigh them – they should be about 200g each. Gently shape each piece into a ball.
- Use a lightly floured rolling pin to roll one of the balls into a rectangle about 4 inches wide and 8 inches long. If the dough is shrinking, let it sit for 10 minutes to help the gluten relax. With the short end of the rectangle facing you, roll the dough away from you to form a 4 inch wide coil. Place into the greased baking tin. Repeat with the remaining 3 balls of dough and place them side by side in the tin.
- Cover the tin and let proof until the dome of the dough rises above the edge of the pan. This takes 6 – 10 hours depending on how warm your kitchen is. I like to place my dough in the oven with the oven light on and door cracked to help create a warmer environment.
- When you're ready to bake, preheat the oven to 400°F. Whisk together the egg and milk to create the egg wash and brush over the top of the loaf. Pop any obvious air bubbles.
- Place in the middle rack and bake for 10 minutes. Then, reduce the temperature to 350°F and bake for another 20 minutes until the loaf is evenly golden brown on top and makes a hollow sound when tapped.
- Remove from the oven and let cool in the pan for 15 minutes. Remove from the pan and let cool for another 30 minutes – 1 hour on a wire cooling rack.
Notes
- Make sure that the milk is warm, but not hot. If it’s too hot, it will kill the yeast. I usually microwave for ~10 seconds until warm to the touch.
- If you want to bake the bread at a different time, you can place the loaf in the fridge after the second proof until ready to bake.
I recently just followed her recipe and it was amazing! I’m a beginner baker and I often find difficult recipes but this one is the one! Super easy to follow. All you need is patience and you’ll definitely have a light and airy bread. I highly recommend anyone to try this.
This is hands down the best recipe for sourdough shokupan! I have tried many others but this is the one I keep coming back to!
Super easy, SUPER flavorful, and accurate directions!
Great recipe. Using food processor to mix and sourdough starter as-is (guessing at end of feeding time). Put cheese in two of the rolls, extra butter in one, leave the last one as is. Bake into a beautiful loaf (just like in your photos), with fluffy layered texture as described, and the right balance of buttery sweetness I sometimes crave. This will be my go to dough. Thank you Hali.
Thank you for sharing Meredith!! I’m glad you love the recipe and cheese sounds like a perfect addition!
Hi all, I’ve followed this recipe a few times already and the family loves, loves this bread. I have also had to make a few changes in timing when I’ve done 2 batches at once. I’ve been able to keep one loaf in my fridge for 4-5 days (at steady 37 deg F.) then baked it after a rise of 6-8 hours proofing. The flavor is slightly more sourdoughy, which my son prefers. Thanks for a great recipe. – I am wondering how the gluten development would change if I did my rests in between coil folds to 15-20 minutes & doing more folds in the 2 hour period? I may try that next to see. 🙂
So glad your family loves this bread! Let me know how the gluten development turns out!
This is the SOFTEST FLUFFIEST Sourdough Bread I’ve ever made!! It’s buttery and flavorful. Thanks a lot for the recipe, Hali. I’ve made this twice within a week 🙂
I followed all the steps and ingredients instructed, only subs the white sugar to dry palm sugar on the second recipe but still turned out perfect!
Thank you Mia! I’m so glad you enjoyed the recipe!
This bread is amazing! So fluffy and delicious! I used coconut milk and non dairy butter sticks and it still turned out great! I’m making it again but doubling the recipe right now! Thank you
So glad you enjoyed!! Thanks for sharing your substitutions!
Thanks so much for this recipe, I found this on Facebook and just knew I had to make it. This was actually my first time successfully making a sourdough bread (my artisan loaves always turn out poorly) but your instructions were so clear and you made this super easy to follow. I learned a lot making this, and this will for sure be one of my staples in my house for a long time!
Thank you for the comment and so glad the recipe is a favorite!!
So glad it worked out well for you Phoenix!
My loaf isn’t browning well. Is it because I am using almond milk?
Hi Shirley, it could be due to the lower sugar content of almond milk, but sometimes I also find that my loaf does not brown as well if it’s been under or over fermented
My new favorite bread recipe! It reminded me of a croissant with its flaky, buttery crumb. 😋I made one loaf and my family devoured it within a few hours. I’ve made it two more times since! It takes some time (hey, most sourdough recipes do😂) but the end result is SO DELICIOUS! Thank you!
It’s one of my favorite bread recipes too! Thank you!
Can this recipe be made with non dairy milk?
Yes, it should work with non dairy milk
No sure why my loaf had a sour note to it. Anyone else have this issue?
Hi Karen, the loaf will generally have a little bit of a sour note since its leavened with sourdough starter. Overall, the loaf will taste more sour the longer it takes for loaf to fully proof. For a less sour loaf, try feeding your starter more often so that it’s more active. Hope this helps!
What type if tin do you use? Measurements, brand, etc…
Hi Liz, I use the KitchenAid nonstick 9x5in loaf tin
hi! can I sub milk with soy milk or other plant based milks? I just dont have cow milk at home right now
Hi! I haven’t tried using plant based milk personally but I think it would turn out similarly
I’ve used oat milk and it’s delicious.
This is the best step by step recipe I’ve seen period. Thank you for clear concise directions and hourly breakdowns it really really helped a lot! And the bread is so delicious! I had a tough critic, my husband lived in Japan for a couple of years, and it has his seal of approval! ☺️ thank you for helping me make delicious bread for my family! ❤️❤️❤️
Wonderful recipe! Will definitely make again. Easy to follow and excellent results.
I lived in Japan for a few years and this is even better than I remember.