
Learn how to bake homemade sourdough bread with a crackling crust and beautiful chew. This simple recipe is perfect for beginners learning how to make their first artisan loaf.
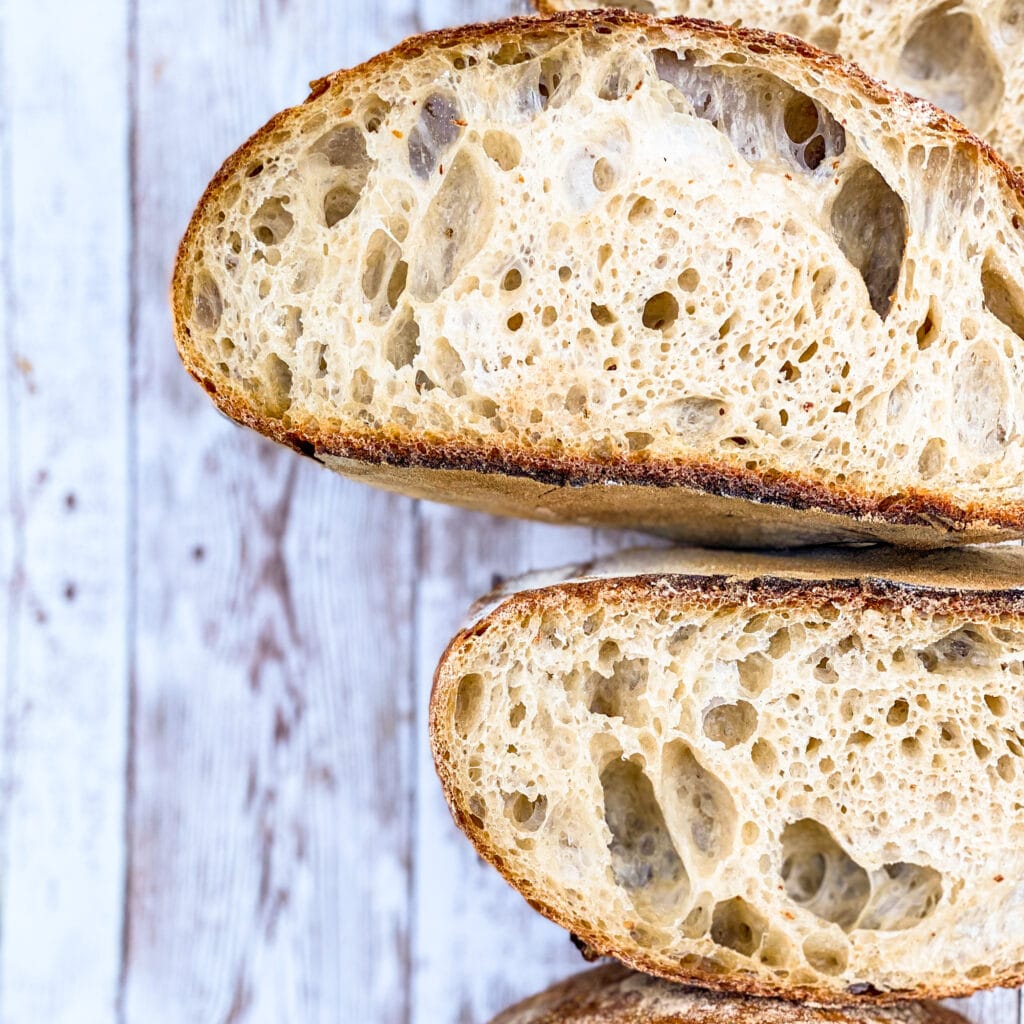
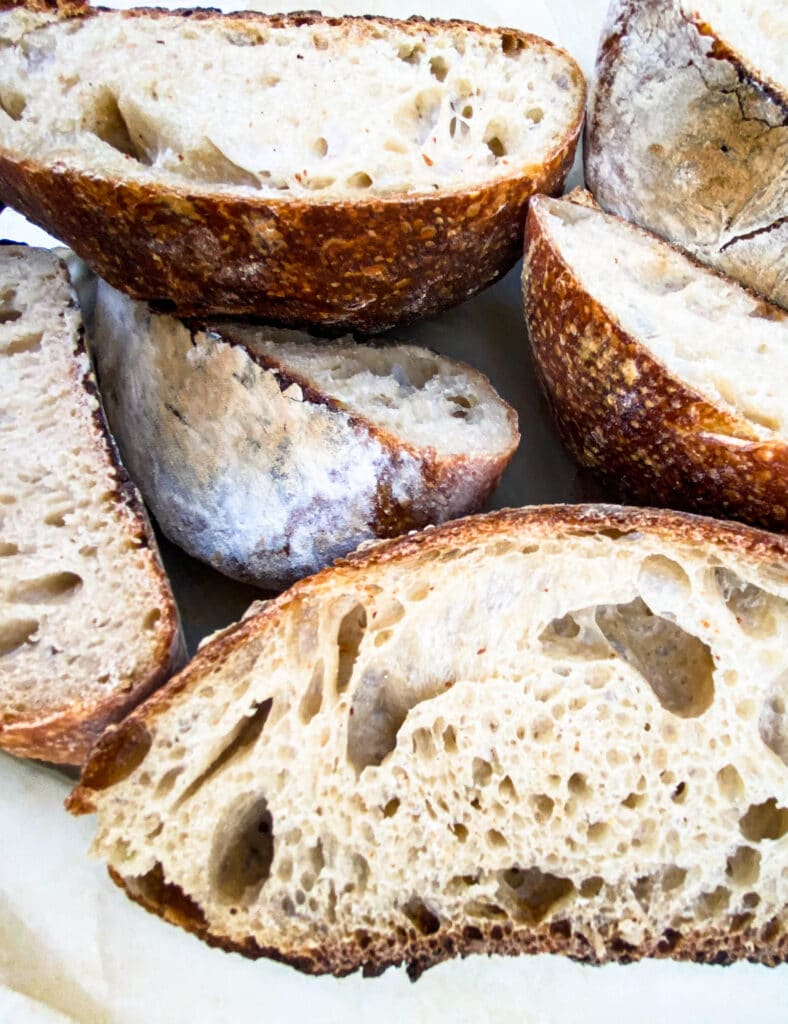
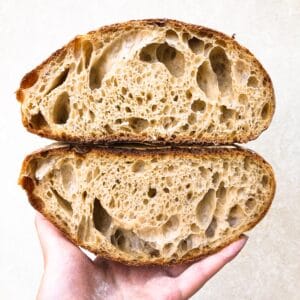
Click here to jump to recipeThere’s no better feeling than slicing into your first fresh, crusty loaf of artisan sourdough bread. A beautiful crust falls open to reveal a soft, moist crumb filled with airy pockets. At least – that’s what you hope will happen!
I’ve baked a number of sourdough loaves, and it has definitely been a journey to figure out a technique that works for me. Sourdough can be a fickle art, and because no two kitchens and no two sourdough starters are the same, people can have varying results even when they follow the same recipe. Today I’m sharing a recipe and technique that are manageable for a beginner sourdough baker – you’ll be taking your first loaf out of the oven in no time!
I’ve customized this beginner artisan sourdough recipe to help with common sourdough problems, such as gluten development and kneading. It also produces a very small loaf, only about 6 inches in diameter. You can definitely double the recipe to make a larger loaf, but I find a smaller amount of dough to be easier to handle.
You’ll also notice that this recipe is only in grams. Because sourdough can be so finicky, I strongly encourage you to invest in a food scale. You don’t want to spend 3 days on a loaf of bread, only to end up with a disaster because the ingredients were not measured properly.

How to make artisan sourdough bread
Sourdough is a multi-day process. Here are the basic phases, assuming that you have already made an active sourdough starter. You can check out my guide to making a healthy starter here.
- Day 1: Refresh and feed your starter. Separate out a small amount to create your levain (a mixture of flour, starter, and water that you’ll add to your dough to leaven your loaf). Mix together your flour and water and let rest overnight.
- Day 2: Create your dough by mixing together the flour, water, levain, and salt. Knead your dough using the slap and fold method and perform a bulk ferment. Bulk ferment is when you allow your dough to rise for a number of hours until is airy and light. Shape the loaf and let proof overnight in the fridge. Proofing is the second rise of your dough.
- Day 3: Score your loaf using a sharp knife and bake in a Dutch oven. Scoring is when you cut a slash into your loaf to provide a release for air created during baking. Let cool completely before slicing.
Essentially, if I want a loaf of bread on Sunday, I’ll start the process Friday evening.
Common mistakes when baking sourdough
- Using a starter that isn’t active enough. If your starter isn’t active, no matter what your dough will not rise. A good sourdough loaf begins with a healthy and happy starter.
- Failing to develop gluten sufficiently. Gluten is a protein in flour that gives bread it’s structure. Kneading and folding dough helps build up strands of gluten. Think of the gluten like the stretchy plastic of a balloon. When you blow air into the balloon, it stretches and holds the air. Similarly, well-developed gluten will hold and capture air created by yeast and allow your sourdough loaf to puff up.
- Not timing your bulk ferment correctly. Your first bulk ferment is key to getting your dough airy and light. If you don’t wait long enough, the yeast will not produce enough air and your loaf will come out flat. If you wait too long, the yeast will create too much air and your loaf will end up collapsing.
- Not timing your final proof correctly. Again, your yeast need just the right amount of time to create air before you toss your loaf into the oven. The heat from the oven encourages your yeast to have a final burst of activity, lifting your loaf. If you don’t proof for long enough, your yeast die from the heat of the oven before the loaf is at its peak height. If you proof for too long, your yeast have already used up all their energy and are unable to muster up a lot of activity in the oven.
How can you avoid these mistakes and pitfalls when making beginner artisan sourdough bread? I’ve compiled an FAQ with my favorite techniques to troubleshoot common sourdough problems.
Beginner artisan sourdough bread FAQ
How do I know if my starter is active enough?
You can use the float test to determine if your starter or levain is ready for baking. Just scoop a tsp of starter and drop it in a glass of water. If it floats, it’s active and airy enough to be used in baking.
Why do I want to let the flour and water mixture rest before adding salt?
I let my flour and water rest overnight in the autolyse method. This allows the flour to absorb the water and also allows gluten to naturally develop without any kneading. Both of these things make the dough much easier to handle. Even a 30 minute autolyse can make a huge difference.
My sourdough is so sticky and wet! How can I knead the dough to develop gluten?
Sourdough is a very sticky and wet dough in general. The high percentage of water helps produce a light and airy crumb during baking. To manage the dough, I love to use the slap and fold method, where you raise the dough with both hands and then “slap” it on the counter. Fold up so the bottom of the dough meets the top, then repeat.
I also supplement the slap and fold with stretching and folding the dough during bulk ferment. About once every hour, I “stretch and fold” the dough by lifting up one side of the dough until it’s stretched out, and then folding it down. I repeat for each side of the dough. This also helps develop gluten.
A final method is just to do your bulk ferment in the fridge overnight. Gluten naturally develops over a long, slow ferment.
How can I tell when enough gluten has developed?
I like to use the window pane test. Taking a golf ball-sized piece of dough, I stretch it between my fingers and hold it up to the light. If it stretches thin enough so that I can see the light shine through it, the gluten has developed. Otherwise, I keep kneading.
How can I tell when I should end the bulk ferment?
Honestly, this is the million dollar question when it comes to baking sourdough. The length of your bulk ferment will depend on a number of factors, including how active your starter is, how humid your kitchen is, and how warm your kitchen is. A more warm and humid environment leads to a faster bulk ferment.
Using a clear container will help you observe the state of your dough. I end my bulk ferment when I notice air bubbles forming on the sides and top of the dough. When I shake the container, my dough will jiggle and feels airy and “alive” in my hands. At this point, the dough will have approximately doubled in size.
How can I tell if I’ve proofed my bread long enough?
I like to use the poke test to determine if my dough is done proofing. Using your index finger, give your dough a firm jab. If the indent fills back slowly about halfway, your dough is ready for baking. If it immediately springs back, it still needs time. If the indent stays, you may have overproofed your loaf.
Do I need a scoring knife to score my loaf?
No, you don’t need a scoring knife. A sharp kitchen knife or a pair of scissors will work fine.
Do I need proofing baskets?
No, I just use a bowl lined with floured towels.
My bread turns out really pale without a nice crust on top. How do I get a thick brown crust?
The key to a good crust is creating steam in your oven. This is why I love to bake my sourdough in a Dutch oven, which captures steam from the loaf. Another way to create steam is to put ice cubes on your baking tray, or to put a tray of water in the bottom of the oven.
You also could have a pale crust because you’ve overproofed your bread. Browning comes from caramelization of sugar in the bread. If you overproof, the yeast have consumed all the sugars.
Okay so that was a lot of reading just to bake a loaf of bread! The best way to improve at making sourdough is just to bake many loaves of sourdough. You may make mistakes, but each batch will turn out better and better. Are you ready to get started?
If you make beginner artisan sourdough bread using this recipe, let me know! You can drop a note in the comments or tag #halicopteraway on Instagram.
Other bread recipes:
Beginner artisan sourdough bread
Equipment
- 1 large mixing bowl
- Food scale
- Dutch oven
- Parchment paper
Ingredients
For the levain
- 10 g starter
- 25 g lukewarm water
- 25 g bread flour
For the dough
- 50 g levain (see above)
- 175 g white bread flour
- 75 g whole wheat flour
- 5 g kosher or sea salt
- 193 g lukewarm water
- additional flour for dusting
Instructions
Day 1
- Create your levain. On the evening of day 1, combine starter, flour, and water together. Cover and let sit overnight.
- Prepare your flour and water. In a large mixing bowl, add your flour and 188g of lukewarm water. Lightly mix together with your hands or a wooden spoon. Cover and let sit overnight.
Day 2
- Perform a float test on the levain to make sure it is ready to use. If it's not ready, try again in 30 minutes.
- Your water and flour mixture should now be soft and stretchy. Add 50g of the levain into the center and incorporate by pinching and folding over the dough. Add the salt and water and incorporate by pinching and folding again. Let sit for 10 minutes.
- Knead your dough. Pour the dough onto a clean countertop and knead using the slap and fold method for about 10 minutes. It will be very wet and sticky at first. Continue to slap and fold and resist the urge to add flour. After a while, the dough will stick to itself more than to your hands or the countertop. Perform a window pane test to see if gluten has developed sufficiently. Return the dough to the bowl and cover.
- Allow your dough to bulk ferment. Let your dough rest anywhere from 3 – 8 hours depending on the temperature of your kitchen and the activity of your starter. Once every hour during the bulk ferment, fold and turn your dough. To do so, grab the edge of the dough and pull up until it has stretched out fully, the bring down to the center. Do this with all 4 edges. At the end of the bulk ferment, the dough should feel light and airy with visible bubbles on the top and sides.
- Shape your dough. Pour your dough onto a lightly floured surface. Grab the edges of the dough and pinch them in the center of the dough so you have a roughly round package. Roll your dough over and let it rest on this seam for 10 minutes. This helps the gluten relax into the final shape. Then, using your hands or a bench scraper, shape into a sphere and let rest for about a minute.
- Line a round bowl with floured kitchen or paper towels. Smoothly transfer your dough into the bowl, with the seam side facing up. Proof for 45 minutes, then cover and place in fridge and finish the proof overnight.
Day 3
- Preheat oven. Place an uncovered Dutch oven in your oven and preheat to 500°F.
- Prepare loaf for baking. Prepare a floured sheet of parchment paper. Towards the end of the preheat, remove your loaf from the fridge. Gently rub flour into the surface of the loaf, which will prevent sticking and burning. Quickly turn the bowl holding your loaf onto the sheet of parchment paper. Using a kitchen knife or scissors, quickly and confidently cut a straight slash on the top of your loaf.
- Bake your loaf. After the oven is done preheating, place your parchment paper with the loaf into the Dutch oven. Cover the Dutch oven with its lid and bake for 25 minutes. Then, remove the lid and bake for another 20 minutes until the crust of the loaf is browned and makes a hollow sound when tapped.
- Remove from the oven and let completely cool (about 2 hours) before slicing. Cooling helps the final structure of the bread settle.
Hi!
In step 2
How much water do you add her:
Add the salt and water and incorporate by pinching and folding again. Let sit for 10 minutes.
Thank you!!!
Hi Jill, You want to add the remaining 5 grams of water!