
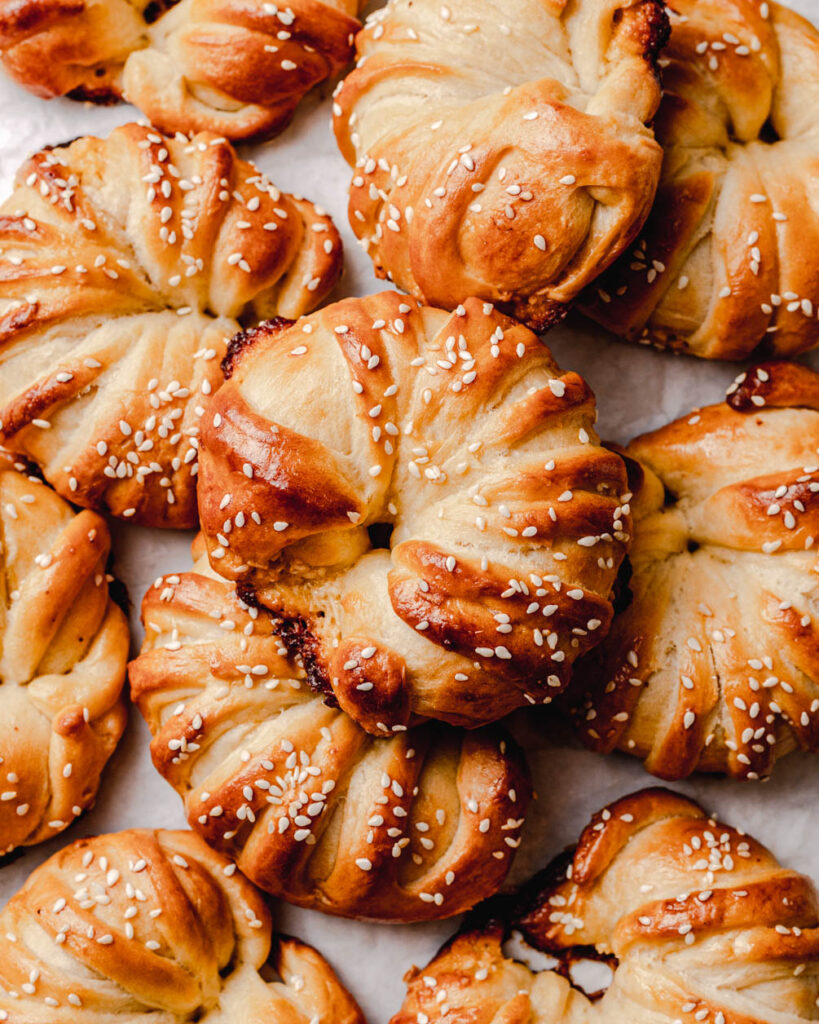
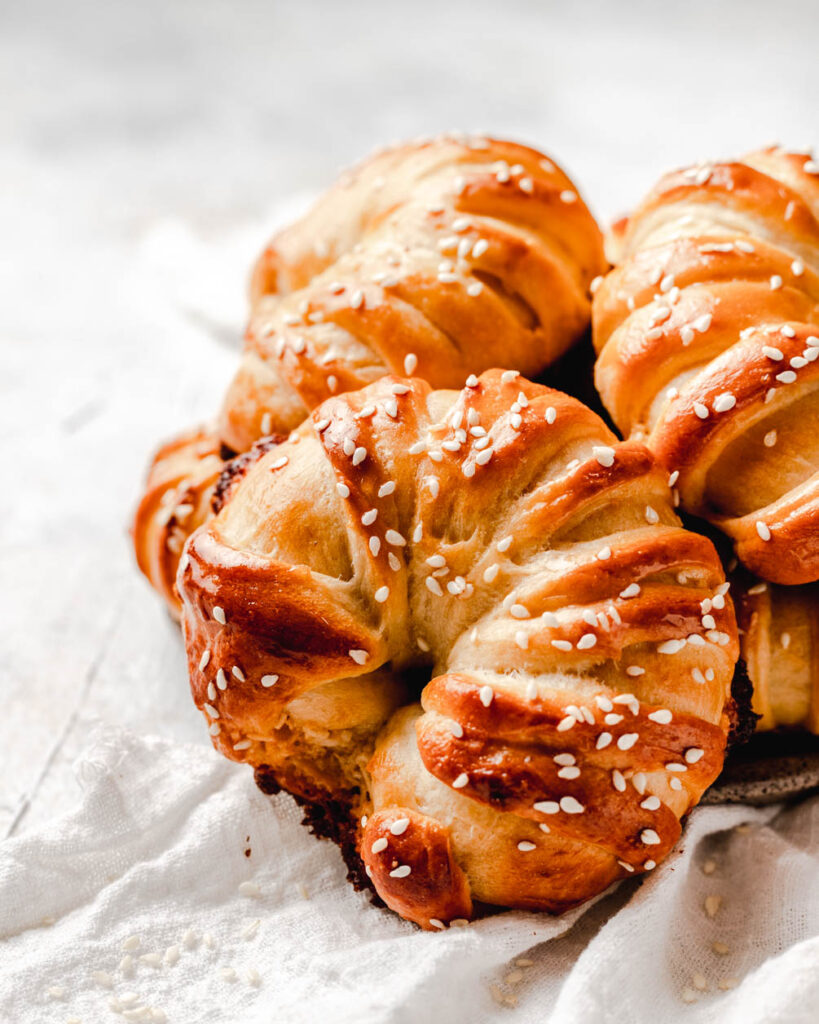
These soft and fluffy coconut buns are dairy-free and full of coconut flavor, from the fluffy Japanese “milk” bread exterior to the sweet filling. They’re inspired by the Asian coconut buns from my childhood!
To be honest, coconut buns were never my favorite Asian bakery bread as a child. Something about that rich coconut filling was just too much for me, and I would often scoop it out and smear it to the side.
As an adult, I now occasionally find myself craving a coconut bun. That soft, fluffy bread combined with a creamy coconut center – I mean it sounds pretty good to me! And taking a bite certainly takes me back to summer mornings in China.
The recipe I’m about to take is my dairy-free take on a coconut bun. It deviates a bit from a traditional bun, with a different ingredient list and overall shape. I’ve also pared back the filling to dough ratio. If you’re a big filling lover, you could easily double the amount of filling!
How to make a dairy-free “milk” bread
Instead of cow’s milk and butter, we’re going to use coconut milk and coconut oil for an absolutely rich and delicious coconut flavor.
We’ll also use the tangzhong method by cooking some of the coconut milk and flour on the stove to create a roux. This process gelatinizes the starches and leads to an incredibly soft and fluffy texture in the final bread!
Tips for making perfect bread
If you’re a beginner bread baker, I recommend reading my guide to bread baking. It will help you troubleshoot different steps of the process and help you feel super confident when you tackle this bread!
Here are some general tips as well:
- Make sure your coconut milk is warm, but not hot. If it’s too hot, it could kill your yeast
- Be precise with your measurements. If you have a food scale, I strongly recommend using it. If not, use the spoon & level method of measuring flour, instead of scooping straight from the bag. Carefully spoon the flour from the bag into the measuring cup, and then level off the top. This prevents the flour from getting packed into the cup and putting in more than you want.
- The temperature and humidity of your kitchen will affect the rise time. So if it’s cooler outside, your bread may take longer to rise!

Tips for a creamy coconut filling
The filling is a simple combination of coconut oil, sugar, dried coconut, egg, vanilla extract, and flour.
First, we’ll cream together the coconut oil and sugar until light and fluffy. We’ll mixed in the dried coconut, egg, and vanilla. Finally, we’ll add some flour to help thicken the mixture.
If you like your buns to be FULL of coconut filling, feel free to double the amount of filling.
When making the filling:
- Make sure to chop the dried coconut. This helps create a smooth rather than stringy texture.
- Make sure to chill the filling for at least 30 minutes. You can do this while the dough rises, and it will make the filling much easier to manage during shaping.
How to shape these coconut buns
We’ll use a fun technique to create little stripes all around the coconut buns. It’s much easier than it looks, but it creates an impressive results.
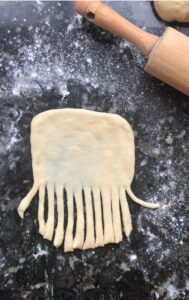
- Roll a piece of dough into a 6 x 6 inch square
- On the lower third of the square, cut strips of dough about 1/4 of an inch thick. The should still be attached to the top part of the dough so that you have a fringe at the bottom.

- Spread the filling on the top part of the dough
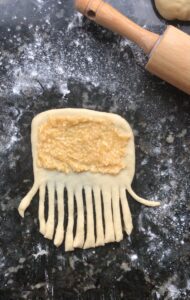

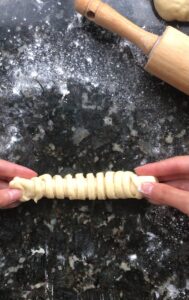
- Gently roll the dough towards you. The fringe will create raised “stripes” of dough.
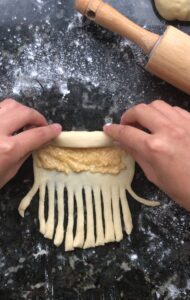
- Gently stretch out the dough and then pinch the ends together. The raised pieces of dough should face inwards, not outwards.

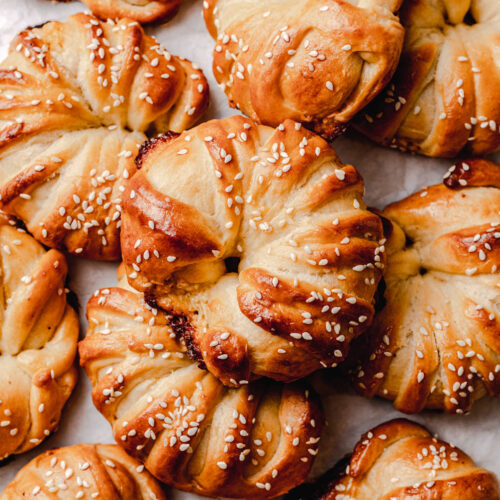
I absolutely love these coconut buns and hope you will too! They’re soft, fluffy, and packed with coconut flavor.

Other Asian-inspired bakes to try
- Mochi red bean buns
- Ruby and white chocolate chewy matcha cookies
- Japanese milk bread by hand (no milk powder)
- Matcha strawberry cream bars
- Black sesame and red bean sourdough
If you make this recipe, please let me know! I always love to see what my readers are baking. You can comment below or tag me on Instagram @halicopteraway.
Want to save this recipe?
Asian bakery coconut buns (dairy-free)
Equipment
- Mixing bowls
- Baking tray
- Rolling Pin
Ingredients
Tangzhong
- 3 tbsp (23g) bread flour
- 1/2 cup (120g) full fat coconut milk
Dough
- 1/2 cup (120g) full fat coconut milk, lukewarm
- 1/4 cup (50g) granulated sugar
- 2 tsp (7g) instant or active dry yeast
- 2 1/2 cups (325g) bread flour
- 1 egg
- 1 tsp salt
- 4 tbsp (60g) coconut oil
Coconut filling
- 3 tbsp (45g) coconut oil
- 1/4 cup (50g) granulated sugar
- 1/2 cup (40g) dried coconut, coarsely chopped
- 1 egg
- 1 tsp vanilla extract
- 2 tbsp all purpose flour
Egg wash & topping
- 1 egg
- 1 tbsp coconut milk or water
- sesame seeds
Instructions
Make the tangzhong
- In small skillet or pot, whisk together flour and coconut milk until smooth. Bring to simmer over medium-low heat, whisking frequently, until mixture has thickened but is still pourable. It should take 5 – 10 minutes. Your whisk should leave a mark when dragged along the bottom of the pan.
- Pour into a bowl and cover surface with plastic wrap to prevent a film from forming, and allow to cool to room temperature.
Make the dough
- In the bowl of a stand mixer, mix together the warm coconut milk, yeast, and sugar. Let sit for 5 – 10 minutes until the yeast is foamy and active. If you do not see any activity, your yeast may be dead. Start over with fresh yeast.
- Add the bread flour, egg, salt, and tangzhong to the bowl. Using a dough hook attachment, need on medium-low speed until the dough just come together. Add the coconut oil in pieces while the mixer is running. The dough may look a little curdled, but it will come together. Scrape down the sides of the bowl as needed. Continue kneading for 10 – 15 minutes until the dough is smooth and passes the window pane test. You can also choose to knead by hand during this step.
- Cover and let rise for 1 – 1.5 hours until doubled in size.
Make the filling
- While the dough is rising, make the filling. In a medium mixing bowl, add the coconut oil and sugar. Use a hand mixer or stand mixer fitted with a paddle attachment to cream together on medium speed until light and fluffy. Mix in the chopped dried coconut until combined. Mix in the vanilla extract and egg, scraping down the sides of the bowl as needed. Finally, mix in the flour. Cover and place in the fridge to chill for at least 30 minutes.
Shape the dough
- Cover a baking tray with parchment paper
- Once the dough is ready, turn it out onto a lightly floured countertop. Knead a few times to release the air. Divide into 12 equal pieces. For extra precision, you can use a food scale – each piece should weigh about 60g.
- Use a rolling pin to roll a piece of dough into a 6 x 6 inch square. If the dough is sticking, lightly flour the surface. Cut slits about 1/4 inch wide across the bottom third of the dough to create a fringe. Take 2 – 3 tsp of filling and spread it on the top part of the dough. Roll the dough towards you and then pinch the two ends together. The raised dough "stripes" should facing inwards. Please read the notes above for pictures of this process.
- Repeat the process with the remaining buns. Place each bun on the baking tray, at least 2 inches apart. Preheat the oven to 350°F.
- Let rise for 30 minutes until puffy. When you press a finger into the dough, it should fill in halfway. If it fills in all the way, it needs more time. If it doesn't fill in at all, it has overproofed and you need to bake immediately.
Bake the buns
- Whisk together the egg and coconut milk to create an egg wash. Generously brush each bun with egg wash and sprinkle the top with sesame seeds.
- Place in the center rack of the oven and bake for 18 – 20 minutes until golden brown and the buns make a hollow sound when tapped.
- Remove from the oven and let cool on the tray for 5 minutes.
- Store leftover buns in airtight containers at room temperature
Notes
- If you like extra filling, you can double the filling recipe
Could you use store bought dough.
I personally haven’t tried, but I think it would work!
Would ap flour or cake flour work?
AP could work, but the dough will be stickier and harder to handle. The buns also won’t be quite as fluffy. I would not use cake flour for this recipe. Hope this helps!
Hi Hali! the dried coconut, are these the coconut flakes? or dessicated coconut?
Hi Kat, desiccated coconut will work better since it’s more finely ground. Hope this helps!