
Ready to bake a beautiful fluffy loaf of bread but don’t know where to start? Having trouble making the perfect brioche? This guide to enriched bread will prepare you for success!
Ahh, bread-making. Is there anything more satisfying then a fresh, warm loaf of homemade bread? A soft, fluffy crumb, a golden brown crust, the sheer satisfaction of kneading, raising, and baking a loaf FROM SCRATCH… it makes you feel like a baking master. So what’s keeping you from baking your own from-scratch bread?
Well, there’s something undeniably intimidating about working with yeast. With all the different factors and variables, bread making can seem like a mysterious process. Will the dough rise? Will it rise too much? How do you know when it’s done baking? A string of questions and doubts can send you to the grocery to buy that loaf instead of making it yourself.
But I want to dispel the mystery around bread – and this post is going to tackle it head on with enriched bread. I want to give you the confidence and knowledge to try your hand at a loaf and experience the satisfaction of your own homemade bread. And if things don’t turn out perfectly the first time, just remember practice makes perfect, and a slightly defunct loaf of bread will still taste pretty good. So if you’re ready… let’s go!
First – what is enriched bread dough and how is it different from regular bread dough?
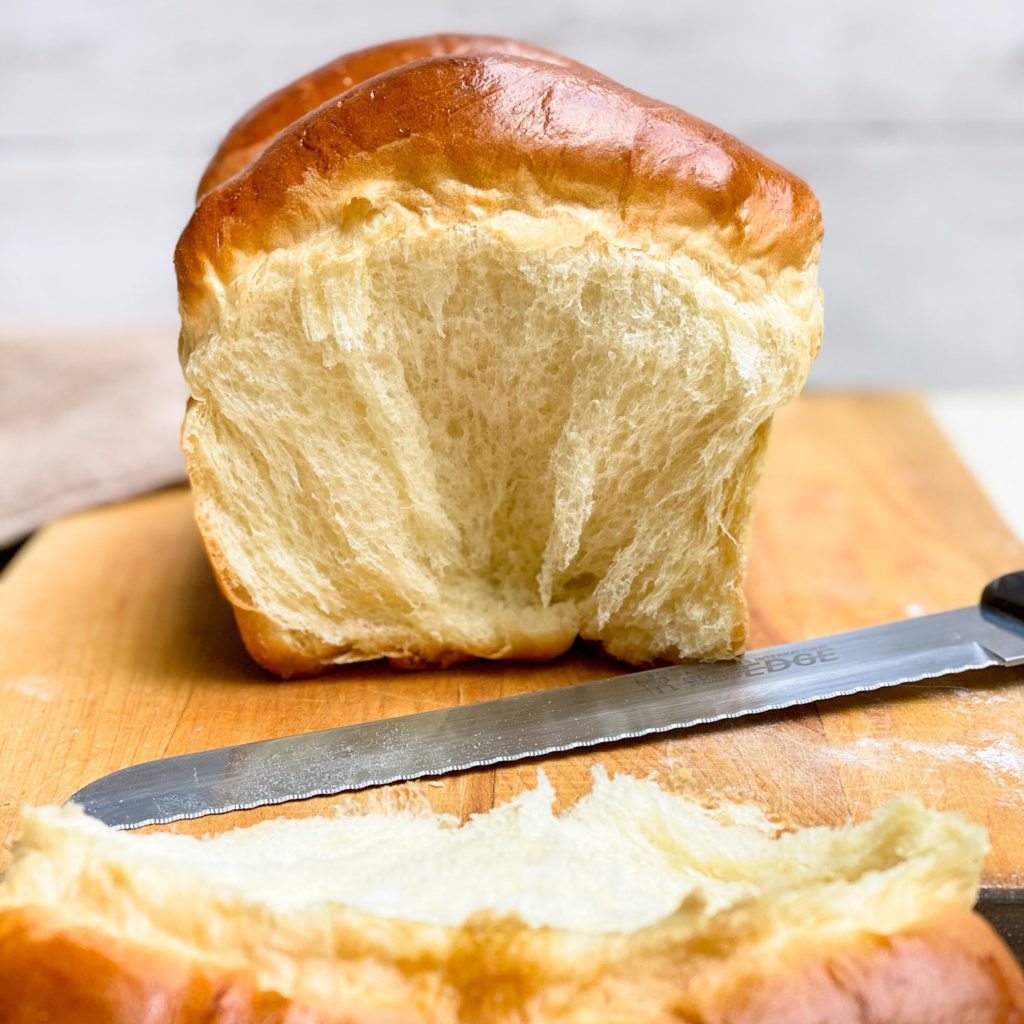
Regular bread dough has simple ingredients – yeast, flour, water, salt. Enriched bread dough adds fats such as milk, butter, and/or eggs. Breads that fall into this category include challah and brioche, and it’s the added fats that give those two breads their luscious golden color.
In each of the bread-making stages, I’ll outline the unique challenges that enriched dough can bring. But, the main thing to keep in mind is patience – enriched dough takes longer to rise (because of the additional weight in the dough), and longer to bake.
What do I need to know to bake the ultimate loaf?
I like to think of 6 stages to breadmaking, which sounds rather like a lot. But I will stress that while breadmaking does not need any advanced skills, breadmaking needs patience. Breadmaking needs time. Breadmaking does not respond well to rushing. So if you proceed methodically with these 6 stages and give them the appropriate time and care, you should produce a lovely loaf.
Here are the 6 stages we’ll walk through:
- Creating the dough
- Kneading the dough
- First proof
- Shaping
- Second proof
- Baking
How to bake enriched bread
-
Creating the dough
The first step is measure out and combine your ingredients, which sounds deceivingly simple. The tricky thing with bread, more so than for say, cookies, is that proportions are critical to achieving a proper rise and bake, so you want to take care to measure your ingredients carefully. If you have a food scale, now’s the time to whip it out since it will give you more precision that cups and tablespoons. The order in which you combine the ingredients is important as well, since mixing your salt and yeast directly together can lead to dead yeast, which will lead to a flat bread. The key thing here is to read the instructions before starting, measure your ingredients before starting, and then carefully follow the instructions. Sounds simple enough, but reading comprehension has been known to fail even the best of us.
What can be tricky about enriched dough: The temperature of your ingredients is important – your butter needs to be room temperature and very soft so that it can properly incorporated into the dough. When you add the fats and how much you add also affects how well they’re incorporated, so again, read your recipe with care!
-
Kneading the dough
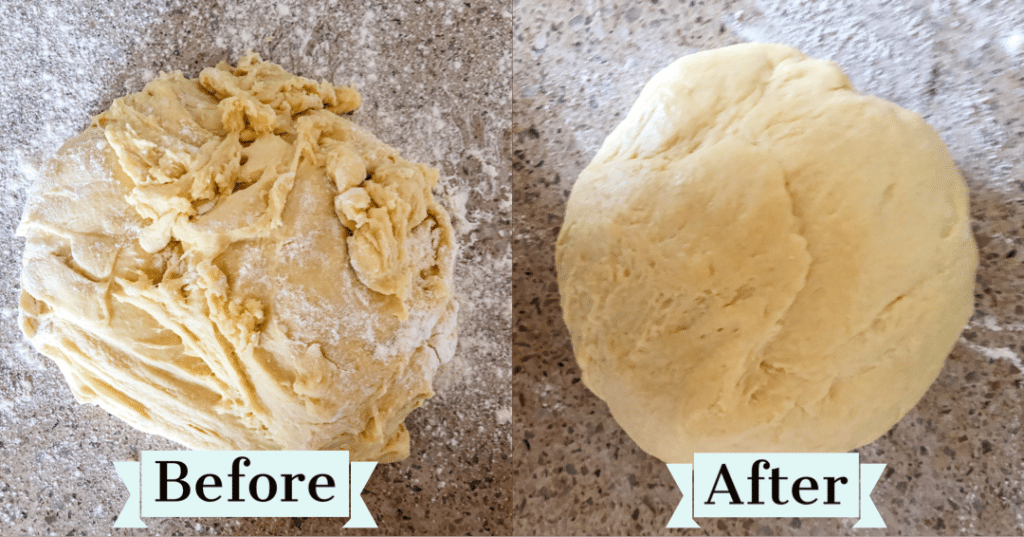

Kneading dough is important because it helps develop the gluten in the bread – this is what gives bread it’s wonderful structure and chew. If you don’t knead your bread properly, it’s texture will be off, so take the time to knead properly. Flour your surfaces and your hands to avoid stickiness, and then go for it. I like to push my palm in forcefully into the dough, rotate 45 degrees, and push in again. You’ll know the dough is at the right stage when it becomes smooth and tight. You can also use the window pane test – when you’re able to stretch the dough out thinly enough so that light shines through and the dough doesn’t break, the gluten has developed sufficiently.What can be tricky about enriched dough: Because of the extra fats, enriched dough requires more kneading to develop the gluten. So get ready for a bicep workout and take the time to knead thoroughly, or use a stand mixer.
-
First proof
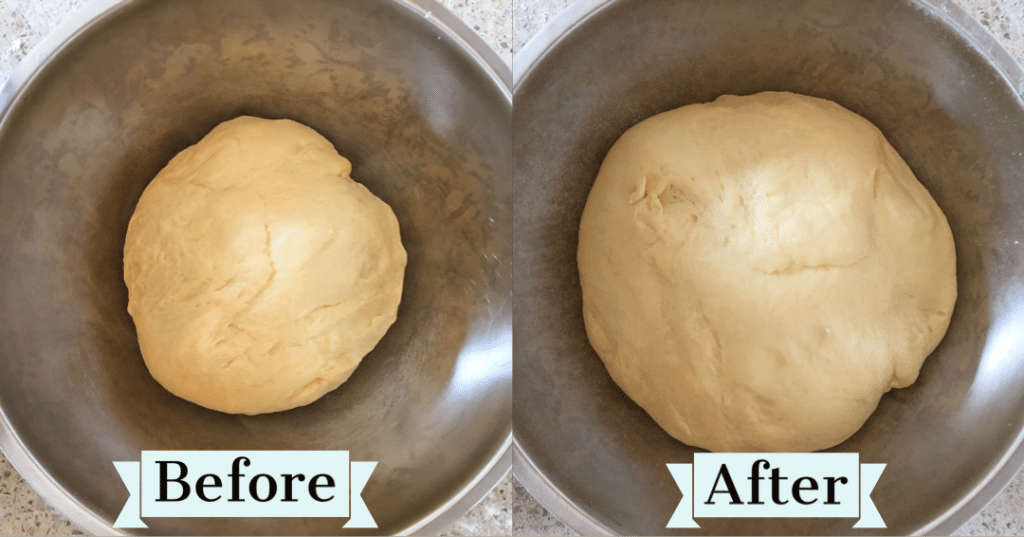
While kneading is all about action, proofing is all about patience (and temperature). Proofing is when you allow the dough to rest and let the yeast take over. As yeast gobble up the glucose in the dough, they reproduce and produce air that causes the bread to rise. Yeast grow more quickly in warm and humid environments, so proofing speed will differ depending on the day. It’s important to let your bread rest and grow sufficiently during this first proof. A rule of thumb is to let it double in size.
What can be tricky about enriched dough: Since enriched dough has additional fats, it will take longer to proof – fats make the dough heavier. You also have to be careful with the temperature, as anything above 85F can make the butter and fats start to melt.
If you’re feeling impatient or are really crunched for time (I espouse patience, but we’ve all been there), there are ways to proof faster – you can check out How to Quickly Proof Bread Dough
-
Shaping
This stage is when you turn your dough into a loaf, and also when you incorporate any additional add-ons. You want to be firm but gentle so you don’t squeeze out too much of the air you just gained on the first proof.
What can be tricky about enriched dough: The dough needs to be handled firmly, and can benefit with chilling the fridge to help firm up the fats. It’s very fun to braid and shape these doughs into all sorts of beautiful patterns!
-
Second proof
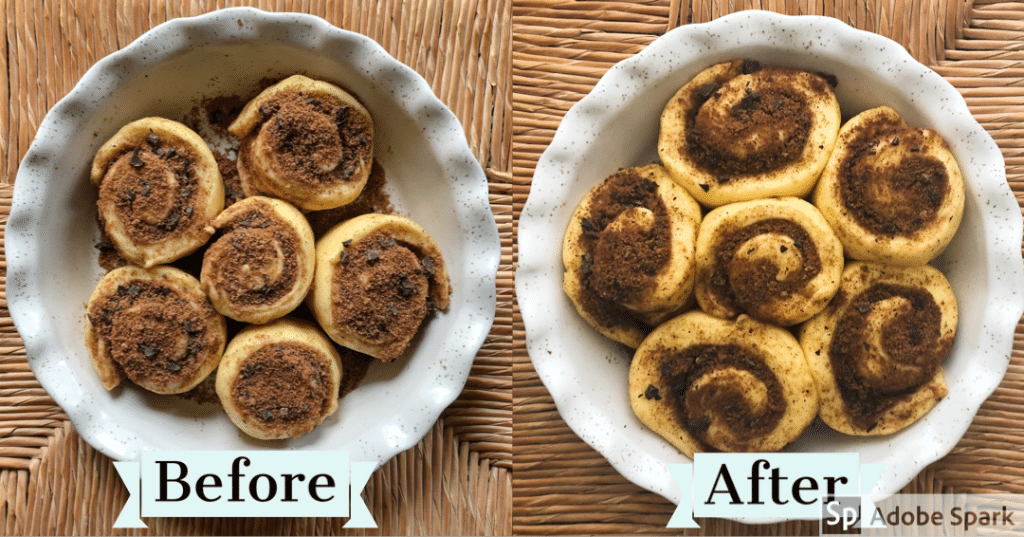
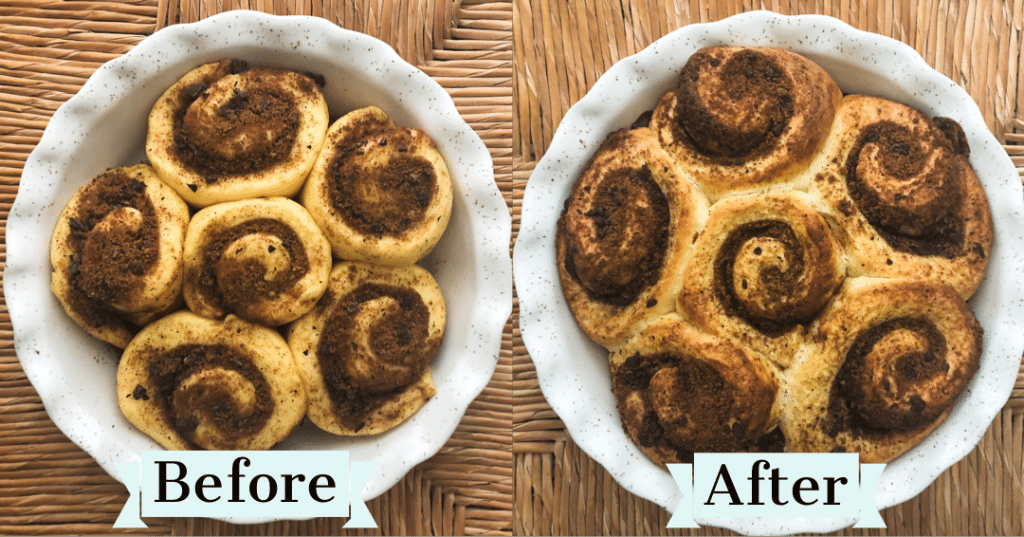
Another round of patience to ensure that your loaf reaches a proper size before going into the oven. If you don’t proof long enough on the second proof, the dough may rise too quickly and then collapse when it hits the warmth of the oven. On the other hand, if you overproof, the loaf will also collapse from it’s own weight. Again, a good rule of thumb is to let your loaves or buns double in size. If you’re using a bread pan, once the dough has risen above the edge of the bread pan, it’ll be ready for baking. Another good test in the poke test. When you poke the loaf with your finger, the indent should fill back slowly to about halfway.
What can be tricky about enriched dough: Enriched dough is more susceptible to collapse because the fats are weighing it down, so be extra careful with the proof time. Sometimes I let my bread rest in the refrigerator overnight for a slower proof that helps flavors develop. -
Baking
Final step, we’re almost there! This is the magical part where your whole house smells cozy and delicious. The key parts of baking are 1) setting the right temperature and 2) baking for the right amount of time. Everyone’s oven is a little different, so the best way to ensure your oven is at the right temperature is to use an oven thermometer. To check if your bread has baked for the right amount of time, tap the top with a spoon – a hollow sound indicates that the middle is cooked through.
What can be tricky about enriched dough: Enriched doughs need to be baked at a lower temperature for a longer time than traditional doughs. But be careful not to overbake, as there is a higher chance your loaf will turn out crumbly and dry.
If you make it through all 6 steps, then congrats – you’re reading to tackle an enriched loaf!
Some great enriched bread recipes for beginners:
All of these warnings and caveats may sound intimidating, but the single most important thing to achieving a fantastic loaf of bread is to practice and experiment and not fear failure. Do it over and over again. Your friends and family certainly won’t mind the explosion of brioche loaves coming out of the kitchen (I know mine didn’t!). And soon you’ll develop an instinct for making loaves that are sure to impress.
Resources:
Bread making for beginners by Bonnie Ohara
https://theweek.com/articles/443386/secret-baking-enriched-breads-home
https://food52.com/blog/16600-how-to-master-sweet-yeasted-doughs-i-e-your-favorite-foods
Pingback: Honey walnut Challah – halicopter away
Pingback: Brown sugar latte rolls – halicopter away
Pingback: Red bean bread with matcha glaze | Halicopter Away
Looks interesting
Pingback: Raspberry custard heart donuts | Halicopter Away
All are good tips!!