
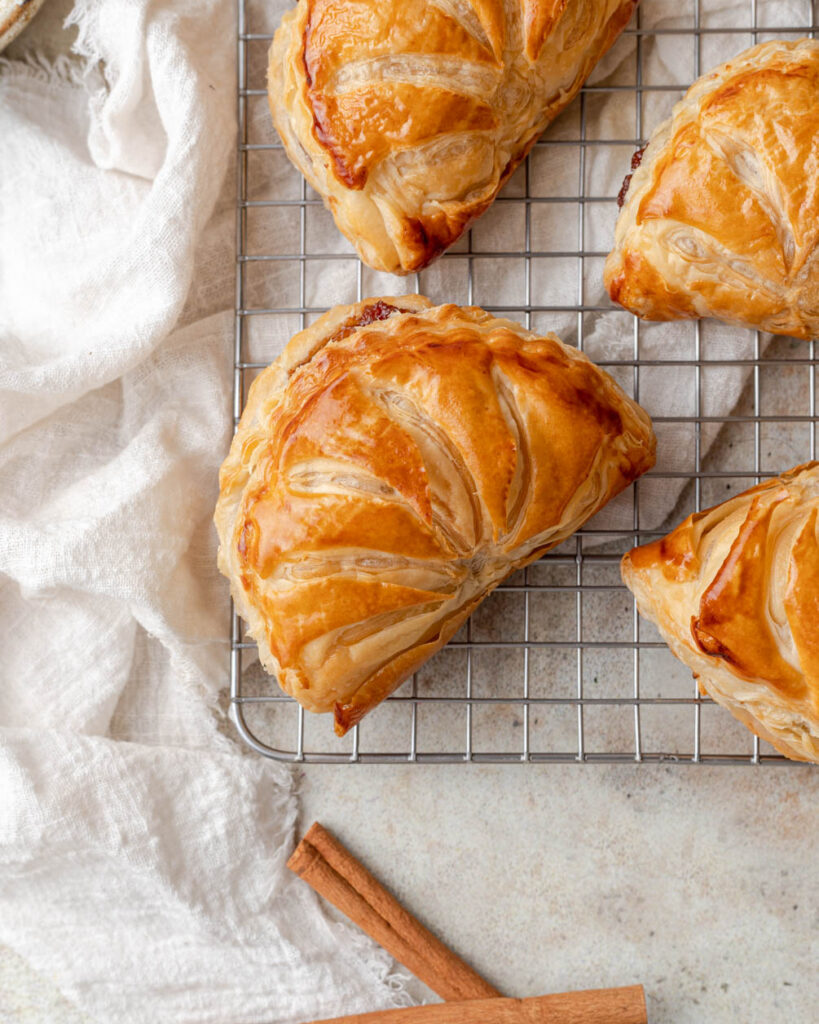
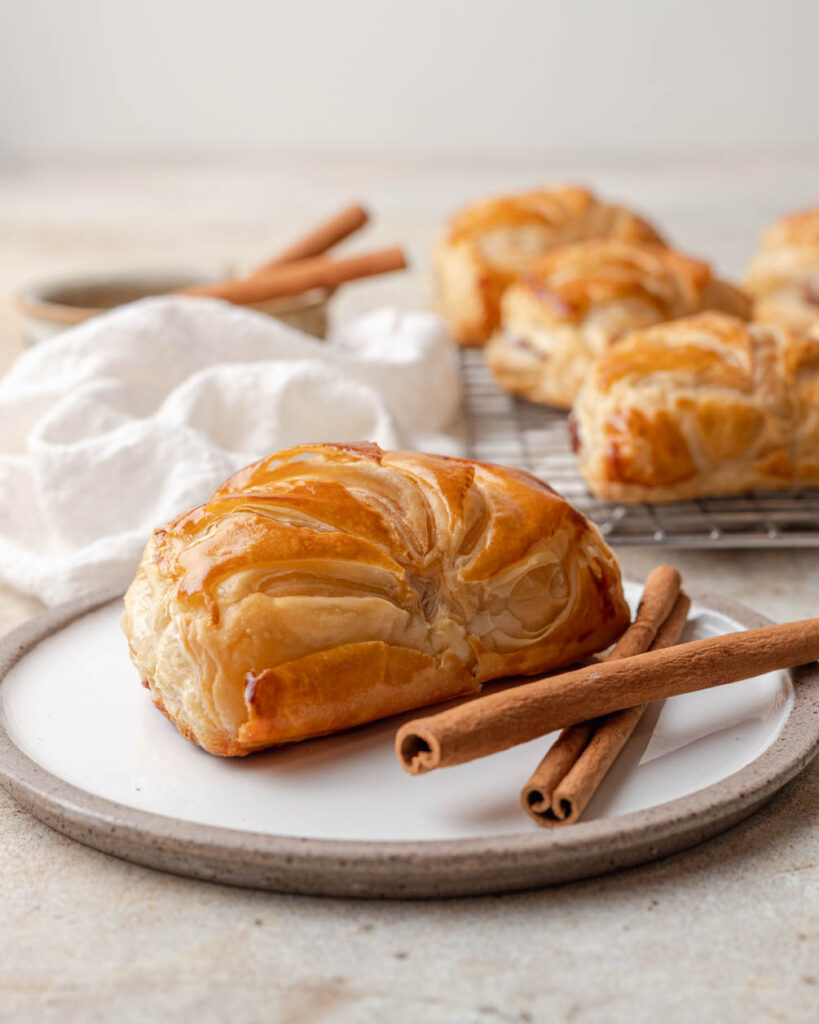
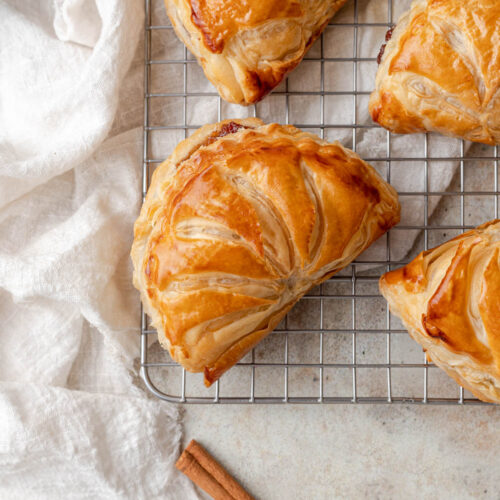
Chaussons aux pommes, or French apple turnovers, are the perfect fall recipe. These flaky, golden pastry pockets are made with homemade full puff pastry and stuffed with a spiced apple filling.
Whenever I visit France, I always seek out the perfect chaussons aux pommes. They are less popular with tourists than the classic croissant or pain au chocolat, but I love the combination of flaky pastry and sweet, spiced apple. They’re even harder to find in the states, so if you’re ever craving a French-style apple turnover, this is the recipe for you!
What are chaussons aux pommes?
Chaussons aux pommes are French apple turnovers made with flaky pastry dough and filled with a chunky spiced apple filling.
How are chaussons aux pommes different from apple turnovers?
Chaussons aux pommes are French, and the name literally means “apple slippers” referring to their half moon shape. There are a few details that make them distinct:
- Full puff pastry – Chaussons aux pommes are often made with full puff pastry, where the butter is laminated as a single sheet with the dough. This creates many flaky layers and a beautiful rise in the oven. In contrast, apple turnovers are often made with rough puff pastry or pie dough, which is not as flaky and puffs up less in the oven.
- Shape – Chaussons aux pommes are often shaped as half-moons with scalloped edges.
How to make full puff pastry
In an effort to replicate the apple turnovers I had in France, I opted to use full puff pastry rather than rough puff for this recipe. Full puff pastry is made using simple ingredients – flour, salt, butter, and water. With the right technique, you can create some truly amazing flaky layers.
- Make the dough (or détrempe) – the dough is made by mixing together flour, salt, melted butter, and cold water until it forms a shaggy ball. You don’t want to fully develop gluten at this stage, as it can make the dough harder to roll out.
- Make the butter slab – the butter slab is made by pounding and rolling butter into an even slab. It’s important for the butter to be an even layer.
- Roll the butter into the dough – The dough and butter need to be the same texture at this point to avoid the butter shattering. I like to freeze my dough for 20 minutes before rolling, and I make sure that my butter is cold and firm, but pliable.
- Laminate the dough – For this recipe, I do one book fold and two regular folds. Between each fold, I rest the dough in the fridge for 30 minutes to firm up the butter and help the gluten relax.
What’s the difference between full puff and rough puff pastry?
Full puff and rough puff pastry are both made through laminating dough and butter to create flaky layers. In general, full puff pastry is more difficult to make, but you get flakier, lighter layers and a better rise.
Full puff pastry has a higher butter to dough ratio and is made by folding a full slab of butter into the dough to create layers. This creates better, more even layers but requires more control of temperature and timing.
Rough puff pastry is made by mixing grated or diced butter into the dough and then folding to create layers. This is faster and easier but results in less even layers.
What if I don’t want to make full puff pastry for this recipe?
The most difficult part of this recipe is making the full puff pastry, so if you want to skip that you can substitute with rough puff pastry or store bought puff pastry. The results won’t be quite the same, but similar enough and still tasty. I do think if you’re looking to practice your pastry lamination and someday hope to make croissants, making full puff pastry is great practice. I actually find it to be pretty fun!
Tips for laminating dough
Laminating dough can be tricky and requires patience and diligence. That being said, it is also pretty forgiving and you’ll still end up with delicious pastry even if you “mess up.” Here are my tips for different parts of the process to help you get the best laminated dough. I also recommend watching the video below for a visual guide.
Preparing the dough
You want to make a dough that has strength and elasticity without being resistant and shrinking when you roll it out.
- Do not over mix the dough. You don’t want the gluten to be fully developed, as the laminating process will further develop the gluten
- Rest the dough in the fridge for at least 2 hours after mixing the dough. This helps the gluten relax and brings down the temperature, making it easier to roll.
- Right before laminating, put the dough in the freezer for 20 minutes. This helps it cool down and firm up so it is more similar in texture to the butter block
Preparing the butter block
Preparing the butter block for lamination can be tricky if you’ve never done it before. It’s important that the block is an even thickness and is cold but pliable.

- Use high quality butter if you’re able. I like to use Kerry Gold
- Use the butter cold from the fridge, and first use a rolling pin to beat between two sheets of parchment paper to soften it and make it more malleable
- Be precise with the measurements of your butter block and make sure it has sharp corners. I draw out the measurements on a piece of parchment paper, then fold to create a packet to encase the butter. I use the rolling pin to roll out the butter into the corners of the parchment paper packet
- After creating the butter block, chill in the fridge until it’s cold but pliable. It should not be rock hard, otherwise it will shatter when you try to laminate it with the dough.
Laminating the dough
Laminated dough is all about timing and temperature.
- Work quickly and apply even pressure when rolling out the dough. Imagine that you’re pushing the dough outwards rather than downwards
- Be patient and make sure to rest the dough for at least 30 minutes in the fridge between turns
- If the dough tears or butter starts melting and leaking, don’t worry! Put it back in the fridge to chill for another 20 – 30 minutes before continuing
What is a single vs double (book) fold?
To create the layers, we’re going to do 2 different types of folds.
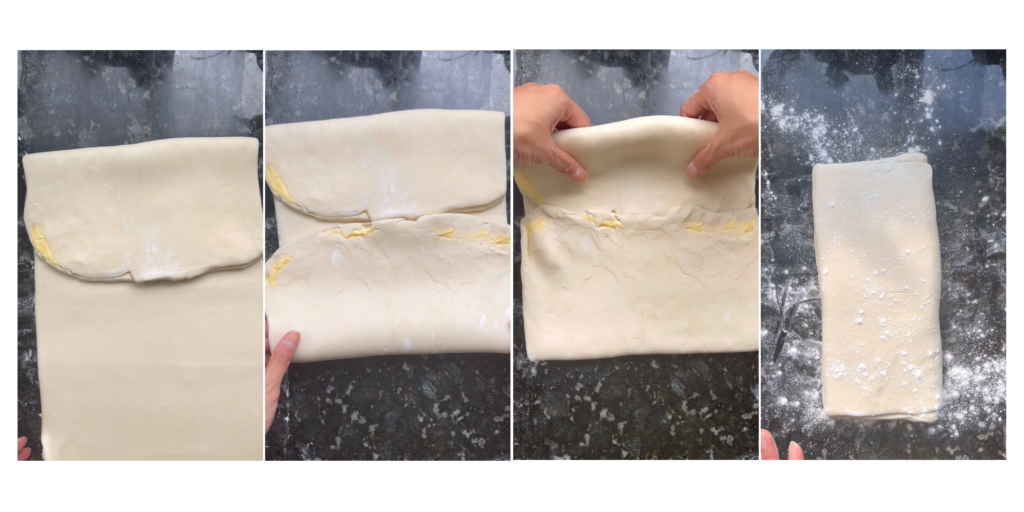
- Single fold – this is where you take the top third of your rolled out dough and fold it down. Then you take the bottom third and fold it up. Now the dough is stacked on top of each other in 3 layers of dough.
- Double fold – this is where you take the top quarter of your rolled out dough and fold it down to the middle. Then you take the bottom quarter and fold it up so that it meets the first folded piece of dough. Then you fold in half at the seam so that the dough is stacked in 4 layers of dough.
How to make a spiced apple filling
The filling for these French apple tarts is made with chopped apples and a variety of spices. I like to combine apple sauce with apple chunks for a mix of textures. If you don’t have a food processor or blender, you can roughly mash the apples using a spoon.
- Dice your apples into small pieces – I have made this recipe with both peeled apples and unpeeled apples. Both versions tasted similar, so I normally will not peel my apples to save myself some time
- Cook over medium low heat with brown sugar, butter, cinnamon, cloves, and all spice.
- Remove two-thirds of the diced apples and set to the side
- Add more butter to the remaining third, and cook until the sauce is very thick. Then blend in a food processor to create a tasty apple sauce
- Mix together the apple sauce and the diced apples to create the filling
How to shape chaussons aux pommes
Chaussons aux pommes are known for their half moon shape and scalloped edges. Here’s how I achieve this look:
- Cut the pastry dough in half and only work on one half at a time, so it doesn’t warm up too quickly
- Roll out the dough to 1/4 inch thick. Use a 4 inch round scalloped cookie cutter to cut out 6 pastries
- Roll out each pastry circle into an oval about 1/8 of an inch thick
- Fill with 1 – 2 tbsp of filling
- Use your finger to gently dab the edges of the pastry with water, and then seal
- Before baking, brush with egg wash to create a beautiful golden brown shine

What to do with the pastry scraps and leftover filling
If you want to avoid pastry scraps altogether, you can cut out rectangles instead of circles. Personally, I love the circular shape. To use up the pastry dough scraps, I fill a small ramekin with any leftover apple filling and top with the pastry scraps to create miniature apple pies.
If you make this recipe, please let me know! I always love to see what my readers are baking. You can comment below or tag me on Instagram @halicopteraway.
Other delicious pastry recipes to try
Chaussons aux pommes
Equipment
- Rolling Pin
- Parchment paper
- Baking sheets
- Large pot
- 4 inch round, scalloped cookie cutter
Ingredients
Dough
- 4 cups (500g) all purpose flour
- 2 1/2 tsp (10g) salt
- 6 tbsp (85g) unsalted butter, melted
- 1 cup + 1 tbsp (265g) cold water
Butter block
- 24 tbsp (335g) unsalted butter, cold
Apple filling
- 6 medium apples, diced
- 3 tbsp (45g) unsalted butter
- 1/2 cup (100g) brown sugar
- 1/2 tbsp cinnamon
- 1/4 tsp all spice
- 1/4 tsp cloves
- 1 tbsp vanilla extract
Egg wash
- 1 egg
- pinch of salt
- 1 tbsp milk or cream
Instructions
Make the dough
- In a large mixing bowl, mix together the flour, salt, melted butter, and cold water. Knead until the dough comes together. The gluten should not be fully developed. For me, this is 2 minutes on medium speed on my stand mixer
- Shape the dough into a 7 x 8 inch rectangle and cover in plastic wrap. Place in the fridge for at least 2 hours
Make the butter block
- Draw out an 8 x 8 inch rectangle on a a large sheet of parchment paper. Fold along the edges to create a parchment sheet packet that will enclose your butter. Set aside
- Place the butter between two sheets of parchment paper and beat with a rolling pin until flattened. Transfer the flattened and softened butter to the center of the 8 x 8 inch rectangle. Fold the parchment paper over the butter so that it is enclosed in the parchment paper packet. Press down with the rolling pin to roll the butter towards the edges of the packet. Make sure that the butter is evenly distributed. You should end up with an 8 x 8 inch butter block
- Place the butter back in the fridge to chill until ready to use
Enclose the butter block + first fold
- Make sure that the dough and butter are the right consistency. 20 minutes before starting lamination, place the dough in the freezer to chill. Check your butter block – it should be firm but pliable. If it's not firm, let it chill for longer in the fridge. If it's not pliable, leave out at room temperature until it is
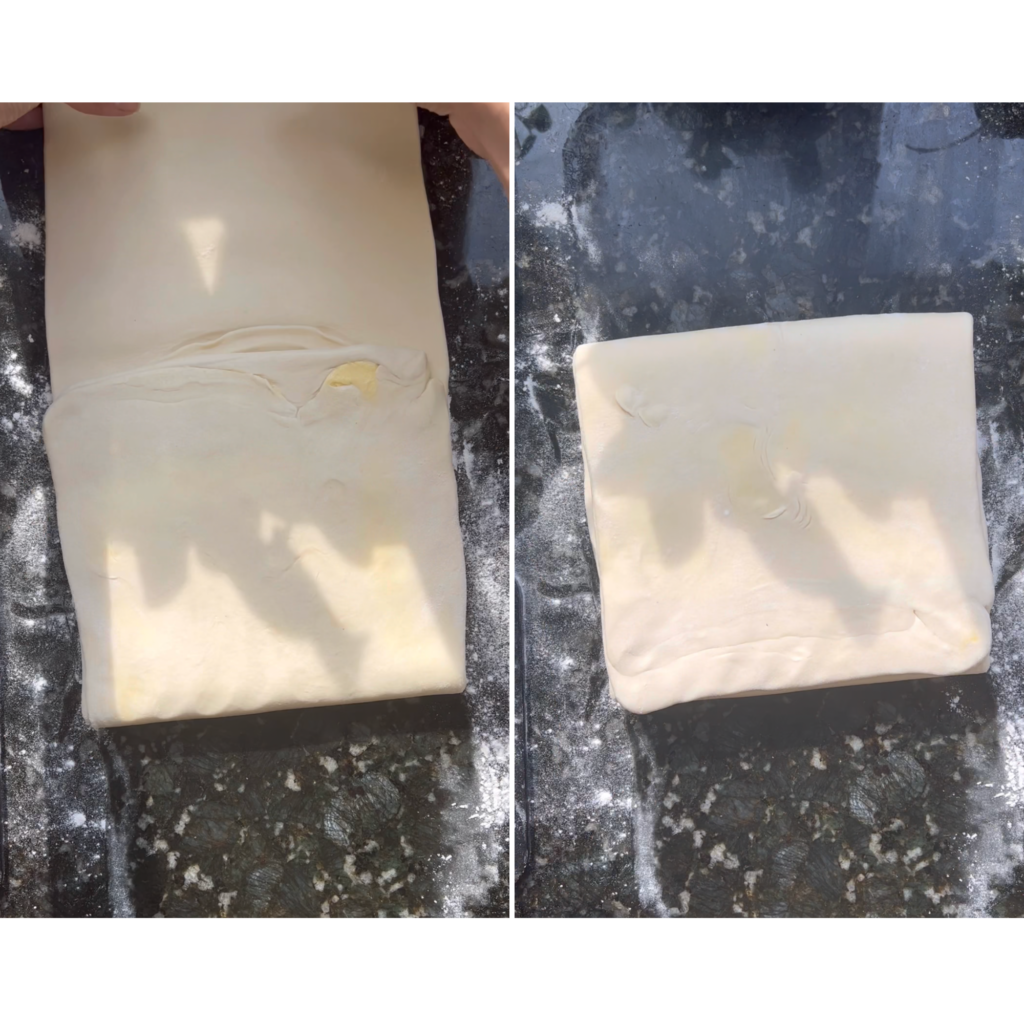
- On a floured surface, roll out your chilled dough into a 16 x 8 in rectangle, with the short size facing you. Place the butter block in the middle of the rectangle. Fold the top part of the dough down, and the bottom part of the dough up so that they meet in the middle and the butter is fully enclosed. Press down on the seam to seal
- Turn the dough 90 degrees and roll out into a rectangle about 1/4 inch thick. You may need to periodically lift up the dough and add more flour to prevent sticking
- Do a book fold. Use a pastry brush to dust away any excess flour. Fold the top edge of the dough to the middle of the rectangle, and fold the bottom edge up to meet the top edge. Then fold along the seam to create a "book"
- Cover in the plastic wrap and place in the fridge to chill for 30 min – 1 hour
Second fold + Third fold
- Remove the dough from the fridge and place on a floured surface. Turn it 90 from the last time you rolled it, so that the open end is facing you. Roll out into a rectangle about 1/4 inch thick
- Do a letter fold. Use a pastry brush to dust away any excess flour. Fold the top third of the dough downwards. Then fold the bottom third of the dough to cover the first fold
- Cover in the plastic wrap and place in the fridge to chill for 30 min – 1 hour
- Repeat the process to create another letter fold
- Cover in the plastic wrap and place in the fridge to chill for 30 min – 1 hour before using for the pastries
Make the apple filling
- Melt 2 tbsp of butter in a large pot over medium heat. Add the diced apples, brown sugar, cinnamon, all spice, cloves, and vanilla extract and stir to combine
- Cook until the apples are tender. Remove 2/3 of the apples and place in a bowl. Set aside
- Add 1 tbsp of butter to the pot, and continue to cook down the remaining apples and liquid. Once the mixture has thickened, transfer into a food processor or blender. Let the mixture cool, then blend on high speed until you have a thick puree
- Mix together the diced apples and apple puree to create your filling. Cover with plastic wrap and place in the fridge to cool. It must be cooled to room temperature before using
Shape the pastries
- Line 2 baking sheets with parchment paper and preheat the oven to 400°F
- Remove the pastry dough from the fridge and cut in half. Work with one half at a time, and leave the other half in the fridge so it does not warm up
- Roll out the dough into an 8 x 12 inch rectangle. Use a 4 in round scalloped cookie cutter to cut out 6 circles of dough
- Take one of the pastry circles and roll out into an oval. Place 1 – 2 tbsp of filling into the center. Dab the edges of the pastry with water, then fold over to seal. Repeat with the remaining pastry circles and place on the baking sheet at least 1 inch apart. Place the pastries in the fridge to chill for at least 20 minutes before baking
- While the first set of pastries chill, repeat with the second half of the pastry dough
Egg wash, score, and bake the pastries
- Beat together the egg, salt, and milk to make an egg wash
- Remove the pastries from the fridge and brush each one with egg wash
- Use a razor or sharp knife to gently score 5 curved lines on the top of the pastry. Do not score so deeply that you break through the dough into the filling. Scoring helps the pastries expand in the oven
- Place in the middle rack of oven and bake for 15 – 20 minutes until golden brown
Notes
- For the apples, I like to use 3 granny smith and 3 fuji apples. I’ve also used assorted apples from apple picking and those worked just as well
- Please refer to the pictures and video references to help with lamination
Hi Hali! I really want to make these for a party this weekend, but I’d like to make them ahead of time – should I freeze them after shaping? And do you know how long I’d need to thaw them (overnight in the fridge and then on the countertop for a couple hours, or just directly from the freezer to room temp for 8 hours)? Thank you!! P.S. I love your tiktok updates about what you learned in pastry school! 🙂
Hi Emily! You can freeze them after shaping, and then thaw them overnight in the fridge. From there you can egg wash and bake directly. It’s best for the pastry dough to stay cold!
Got it, I’ll let you know how they turn out. Thank you so much!