
A reflection on my first week of pastry school at Ferrandi Paris, and takeaways for making the best choux pastry. Once you’ve mastered choux pastry, you can make a variety of classic desserts, from eclairs and profiteroles to churros!
What is choux pastry?
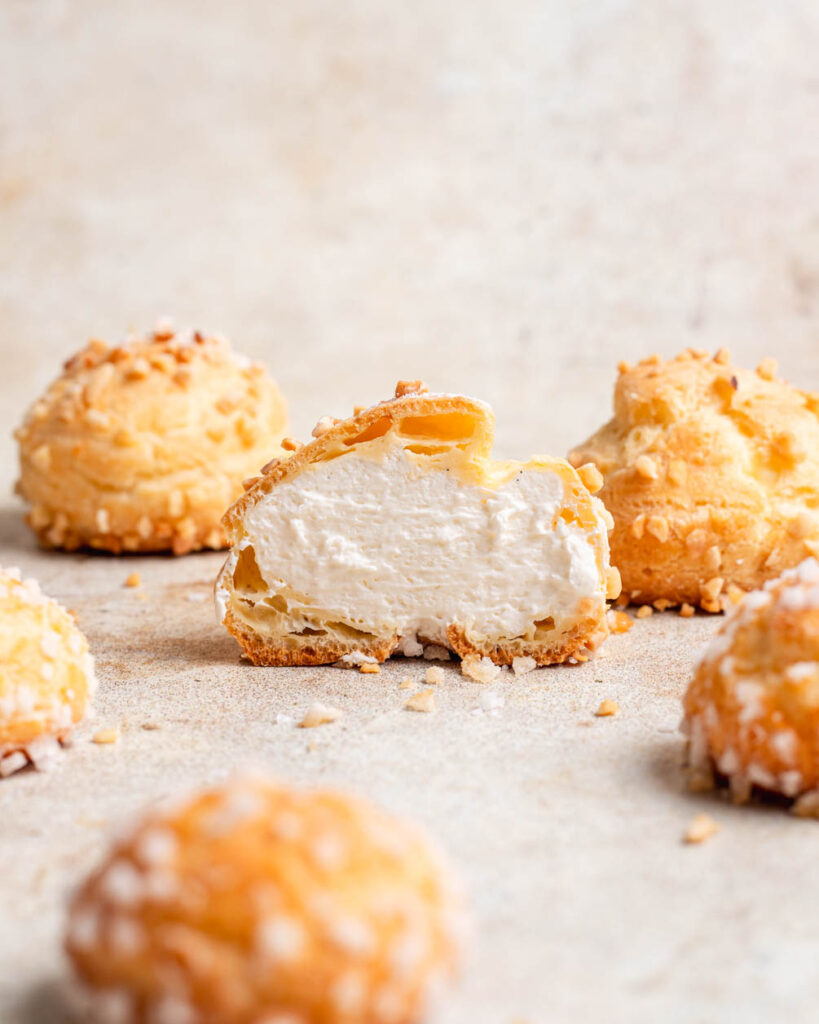
Choux pastry, also known as pâte à choux in French, is a light and airy pastry dough used to make various desserts and even savory treats. In its simplest form, it is made from just a few ingredients: water, butter, salt, flour, and eggs. The dough is cooked twice, first on the stovetop, then in the oven, resulting in a hollow pastry with a crisp exterior and a tender interior. The hollow makes it perfect for filling with a variety of creams!
What can you make using choux pastry?
You can make a number of delicious pastries using choux pastry, such as:
- eclairs
- cream puffs
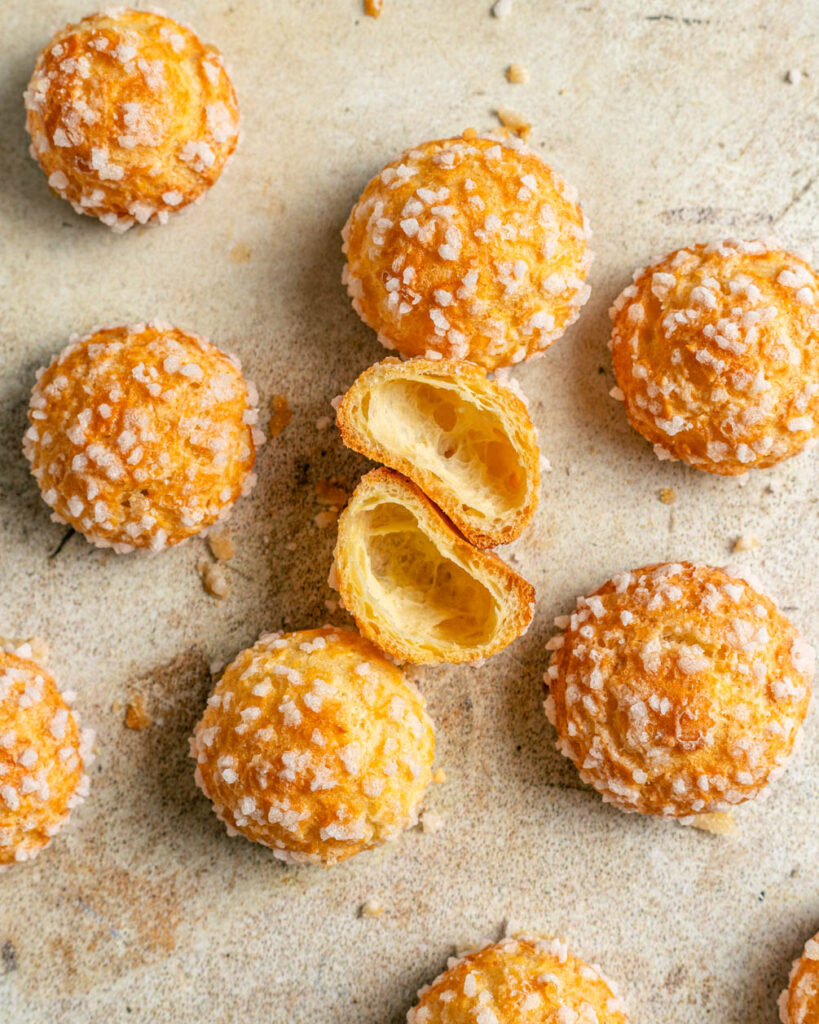
- chouquettes
- churros (fried choux pastry)
- gougeres (cheese puffs)
- Paris brest
- Gateaux St-Honore
What are the criteria for good choux pastry?
As with any sort of cooking or baking, I’d say the criteria for a “perfect” choux pastry is somewhat subjective. It depends on the overall composition of the recipe as well as personal taste. With that being said, here is what we were aiming for in class:
- even size and shape
- smooth shells with no cracks or protrusions
- crisp texture
- even browning and color
- puffed up and hollow on the inside
Choux pastry ingredients
The most basic choux pastry recipe uses the following ingredients:
- Water
- Salt
- Butter
- Flour
- Eggs
Can you replace the water with milk for choux pastry?
You can replace some or even all of the water with milk. In class, we would make pastry with half water, half milk. More milk creates a richer flavor, while more water creates a crisper texture.
We did a taste test for 100% water vs 50% water and 50% milk pastry, and honestly I could not really tell the difference between the two. If you are adding a filling to the choux, you’re even less likely to taste the difference.
Can you add sugar to choux pastry?
Yes, to balance out the salt you can add sugar to the pastry dough. I found the lack of sugar to be fairly noticeable for unfilled shells or fillings that were not that sweet.

How to make choux pastry
Before pastry school, I’d made choux quite a few times. School helped me break down the different steps and learn how each step contributes to the final result. Here is an overview of the process:
- Combining ingredients to make a ball of dough on the stove
- Cooking and drying out the dough on the stove
- Adding egg to the dough
- Piping into your desired shape
- Finishing off the piped choux with a glaze or topping
- Baking the choux
Making the dough ball aka “panade”
Goal: the objective of this stage is to combine your water/milk, salt, butter, and flour to create a homogenous, smooth dough. There should not be any lumps of flour.
- Start by melting your butter with your water/milk, and salt on the stove over a low heat
- Once the butter is melted, bring everything to a boil. Waiting for the butter to melt first ensures that everything heats at the same temperature
- Once the mixture hits a boil, dump in all of your flour at once and immediately stir or whisk to incorporate. It’s important to add all the flour in one go at this stop, and then stir vigorously to combine and smooth out any lumps
Cooking the dough on the stove
Goal: the objective of this stage is to cook the flour and dry out the dough over the stove. This helps your final product reach the right consistency
- Over heat, use a spatula to stir the dough and press it against the sides of the pot
- Watch for the following signs to know it’s done cooking:
- the dough does not stick to the spatula or sides of the pot
- a thin film of dough forms over the bottom and sides of the pot
For us, this process took 1 – 2 minutes but it will vary depending on how much dough you are making.
Adding egg
Goal: the objective of this stage is to incorporate egg to reach the right consistency for piping and baking
- Transfer the dough into a bowl
- Cool down the dough by stirring with a spatula for a few minutes. If the dough is too hot when you add the eggs, you’ll end up with scrambled eggs
- Slowly add the beaten egg, mixing between each step until you reach a smooth consistency
For a home baker, this is likely the trickiest step as you really have to go by look and feel rather than strict quantities. The amount will vary depending on the texture you want to achieve and how much you dried out the choux on the stove.
How can you tell when you’ve added enough egg to choux pastry?
Your choux pastry should be smooth and liquid, but still strong enough to hold its shape. Here are signs that your choux pastry is ready to be piped:
- It flows in slow ribbons off your spatula
- It hangs off your spatula in a deep V shape
- When you separate the mass of dough with your spatula, it slowly flows back into the gap like lava
That being said, one of my takeaways from class is that the “perfect” consistency is subject to personal preference and your baking technique. Some chefs prefer the choux a little drier, or a little wetter.
Piping choux
Goal: the objective of this stage is to pipe your choux pastry into your desired shape. You want them to be as consistent as possible
Should you pipe choux on silicone mats, parchment paper, or directly on the pan?
One thing I learned in school was how piping on different surfaces can affect the final product. You want a lot of heat to hit the choux to start drying it out. Turns out there isn’t a huge different between parchment paper and directly on a pan, but a non-perforated silicon mat can lead to a thin and fragile bottom. This is because the mat traps moisture and humidity during baking.
What piping tip should you use for choux pastry?
The piping tip will depend on the final shape you are trying to achieve. One thing I learned was that a French star tip for eclairs can help the pastry expand more evenly in the oven. This is because the star tip creates more surface area, like an accordion.
Glazing / topping choux
Goal: the objective of this stage is to finish the piped choux with a glaze or topping for optimal flavor and a smooth texture.
I definitely learned a lot about the different ways you can finish off a choux before putting them in your oven. At home, I’ve always used an egg wash, but it turns out there are a number of options. Here are some of the options that we experimented with in class
- Water – helps the choux expand more smoothly in the oven, though I noticed it was not as smooth as something with fat in it, like butter
- Clarified butter – helps the choux expand more smoothly in the oven
- Oil spray – helps the choux expand more smoothly in the oven
- Powdered sugar – helps the choux brown more and adds sweetness
- Dextrose + cocoa butter – the dextrose helps the choux brown more, without adding as much sweetness as sugar. The cocoa butter helps the choux expand more smoothly in the oven
- Egg wash – adds a shiny finish to the choux. However, it turns out egg wash actually has a tendency to cook and set in the oven, which leads to uneven choux expansion.
- Pearl sugar, crushed nuts – adds flavor and texture
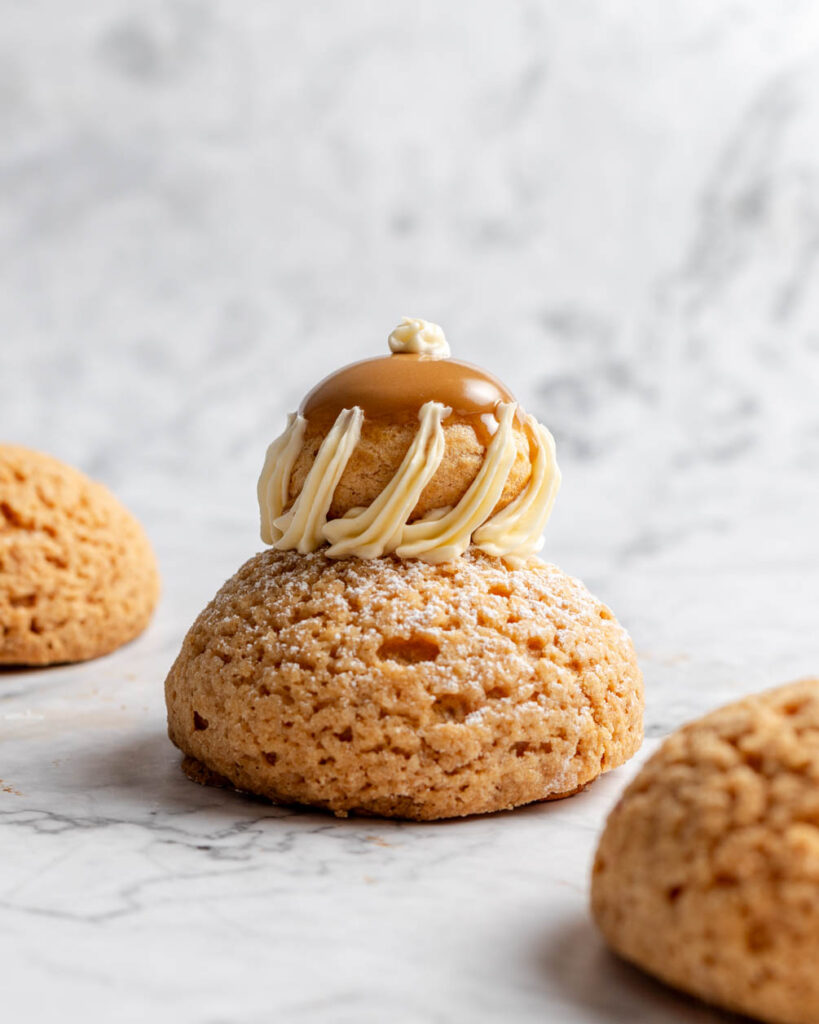
- Craquelin – Craquelin is a thin cookie topping made of butter, sugar, and flour. It adds sweetness and texture and helps create a uniform smooth texture. Be careful though, because if the craquelin is too heavy, the choux will not puff as much in the oven
Baking choux
Goal: the objective of this stage is to create a puffed, smooth, evenly browned, and crispy pastry
Before pastry school, the only thing I really thought about when baking choux was the make sure not to open the oven in the middle of baking, lest the choux pastry collapse. While this is a pretty good rule of thumb for a home baker, I learned that there are actually a lot of considerations when baking choux pastry!
- During the first stage of the bake (~10 minutes or so depending on size), the goal is to trap heat and humidity so that the choux begin to puff and increase in size. At a certain point though, you don’t want the choux to continue to expand as that can leads to cracks. This brings us to the next stage
- If you open the oven during this stage, you’ll likely end up with pancake flat choux
- After the choux has puffed to a certain point, you want to “vent” the oven. In class, the professional ovens had a vent you could open. We also cracked the door open with a little piece of plastic, which I guess would be the home baker version of venting. Venting helps remove excess humidity to prevent cracks. This stage was about 20 – 35 minutes depending on the size of the pastry.
- Once the choux is mostly baked, you want to “dry out” the pastry so it reaches a brown and crispy state. At this point, we closed the vent and let the pastry sit for the final 5 – 10 minutes of the bake.
Of course, this method is only one of many as each chef will have their own baking technique. For example, some chefs will start with an extremely hot oven, put in the choux, then turn off the oven completely for most of the bake.
How to store choux pastry
Choux pastry actually stores quite well in the freezer!
- Unbaked – you can pipe then freeze your choux pastry, then bake directly from its frozen state. Some chefs even freeze the pastry in molds, to create a perfect consistent shape
- Baked – post baking, you can also freeze the unfilled shells
Troubleshooting choux pastry
Why is my choux pastry flat?
No one likes sad, flat choux pastry. Here are some reasons why your pastry may be flat:
- Dough was too wet. A too wet dough tends to be flatter and more spread out
- Opened the oven too early. You opened the oven before the dough had a chance to set, leading to collapse
Why is my choux pastry cracked?
Sometimes you might want cracks as an aesthetic choice, but here are some reasons you may have unintentional cracks or protrusions:
- Dough was too dry and not enough egg was added
- The oven was too hot and humid
- Piping was uneven or shaky
- The flour was not evenly incorporated, leading to lumps. It helps to sift the flour, and make sure to stir quickly and vigorously when adding the flour
Why is my choux pastry soft and soggy?
Choux pastry needs to be crisp, especially so it can hold up to moist filling. Here are some reasons why your pastry may be too soft:
- Not long enough bake time. Drying out the pastry at the end is important for it be crisp
- Dough was too wet
Choux pastry recipes
Here are some of my recipes that use choux pastry:
Thank you very much Hali, for your insightful instructions. You have been very helpful in my quest to make a very good cream puff.