
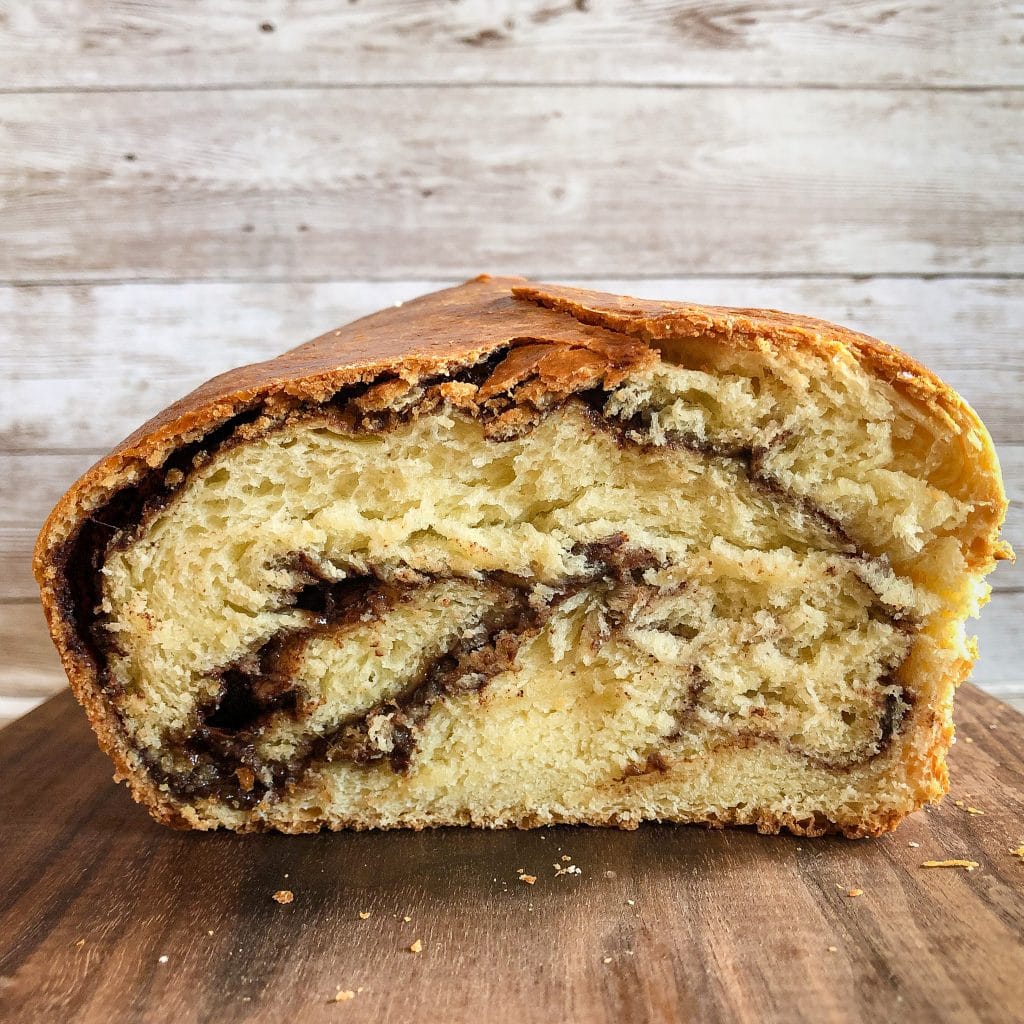
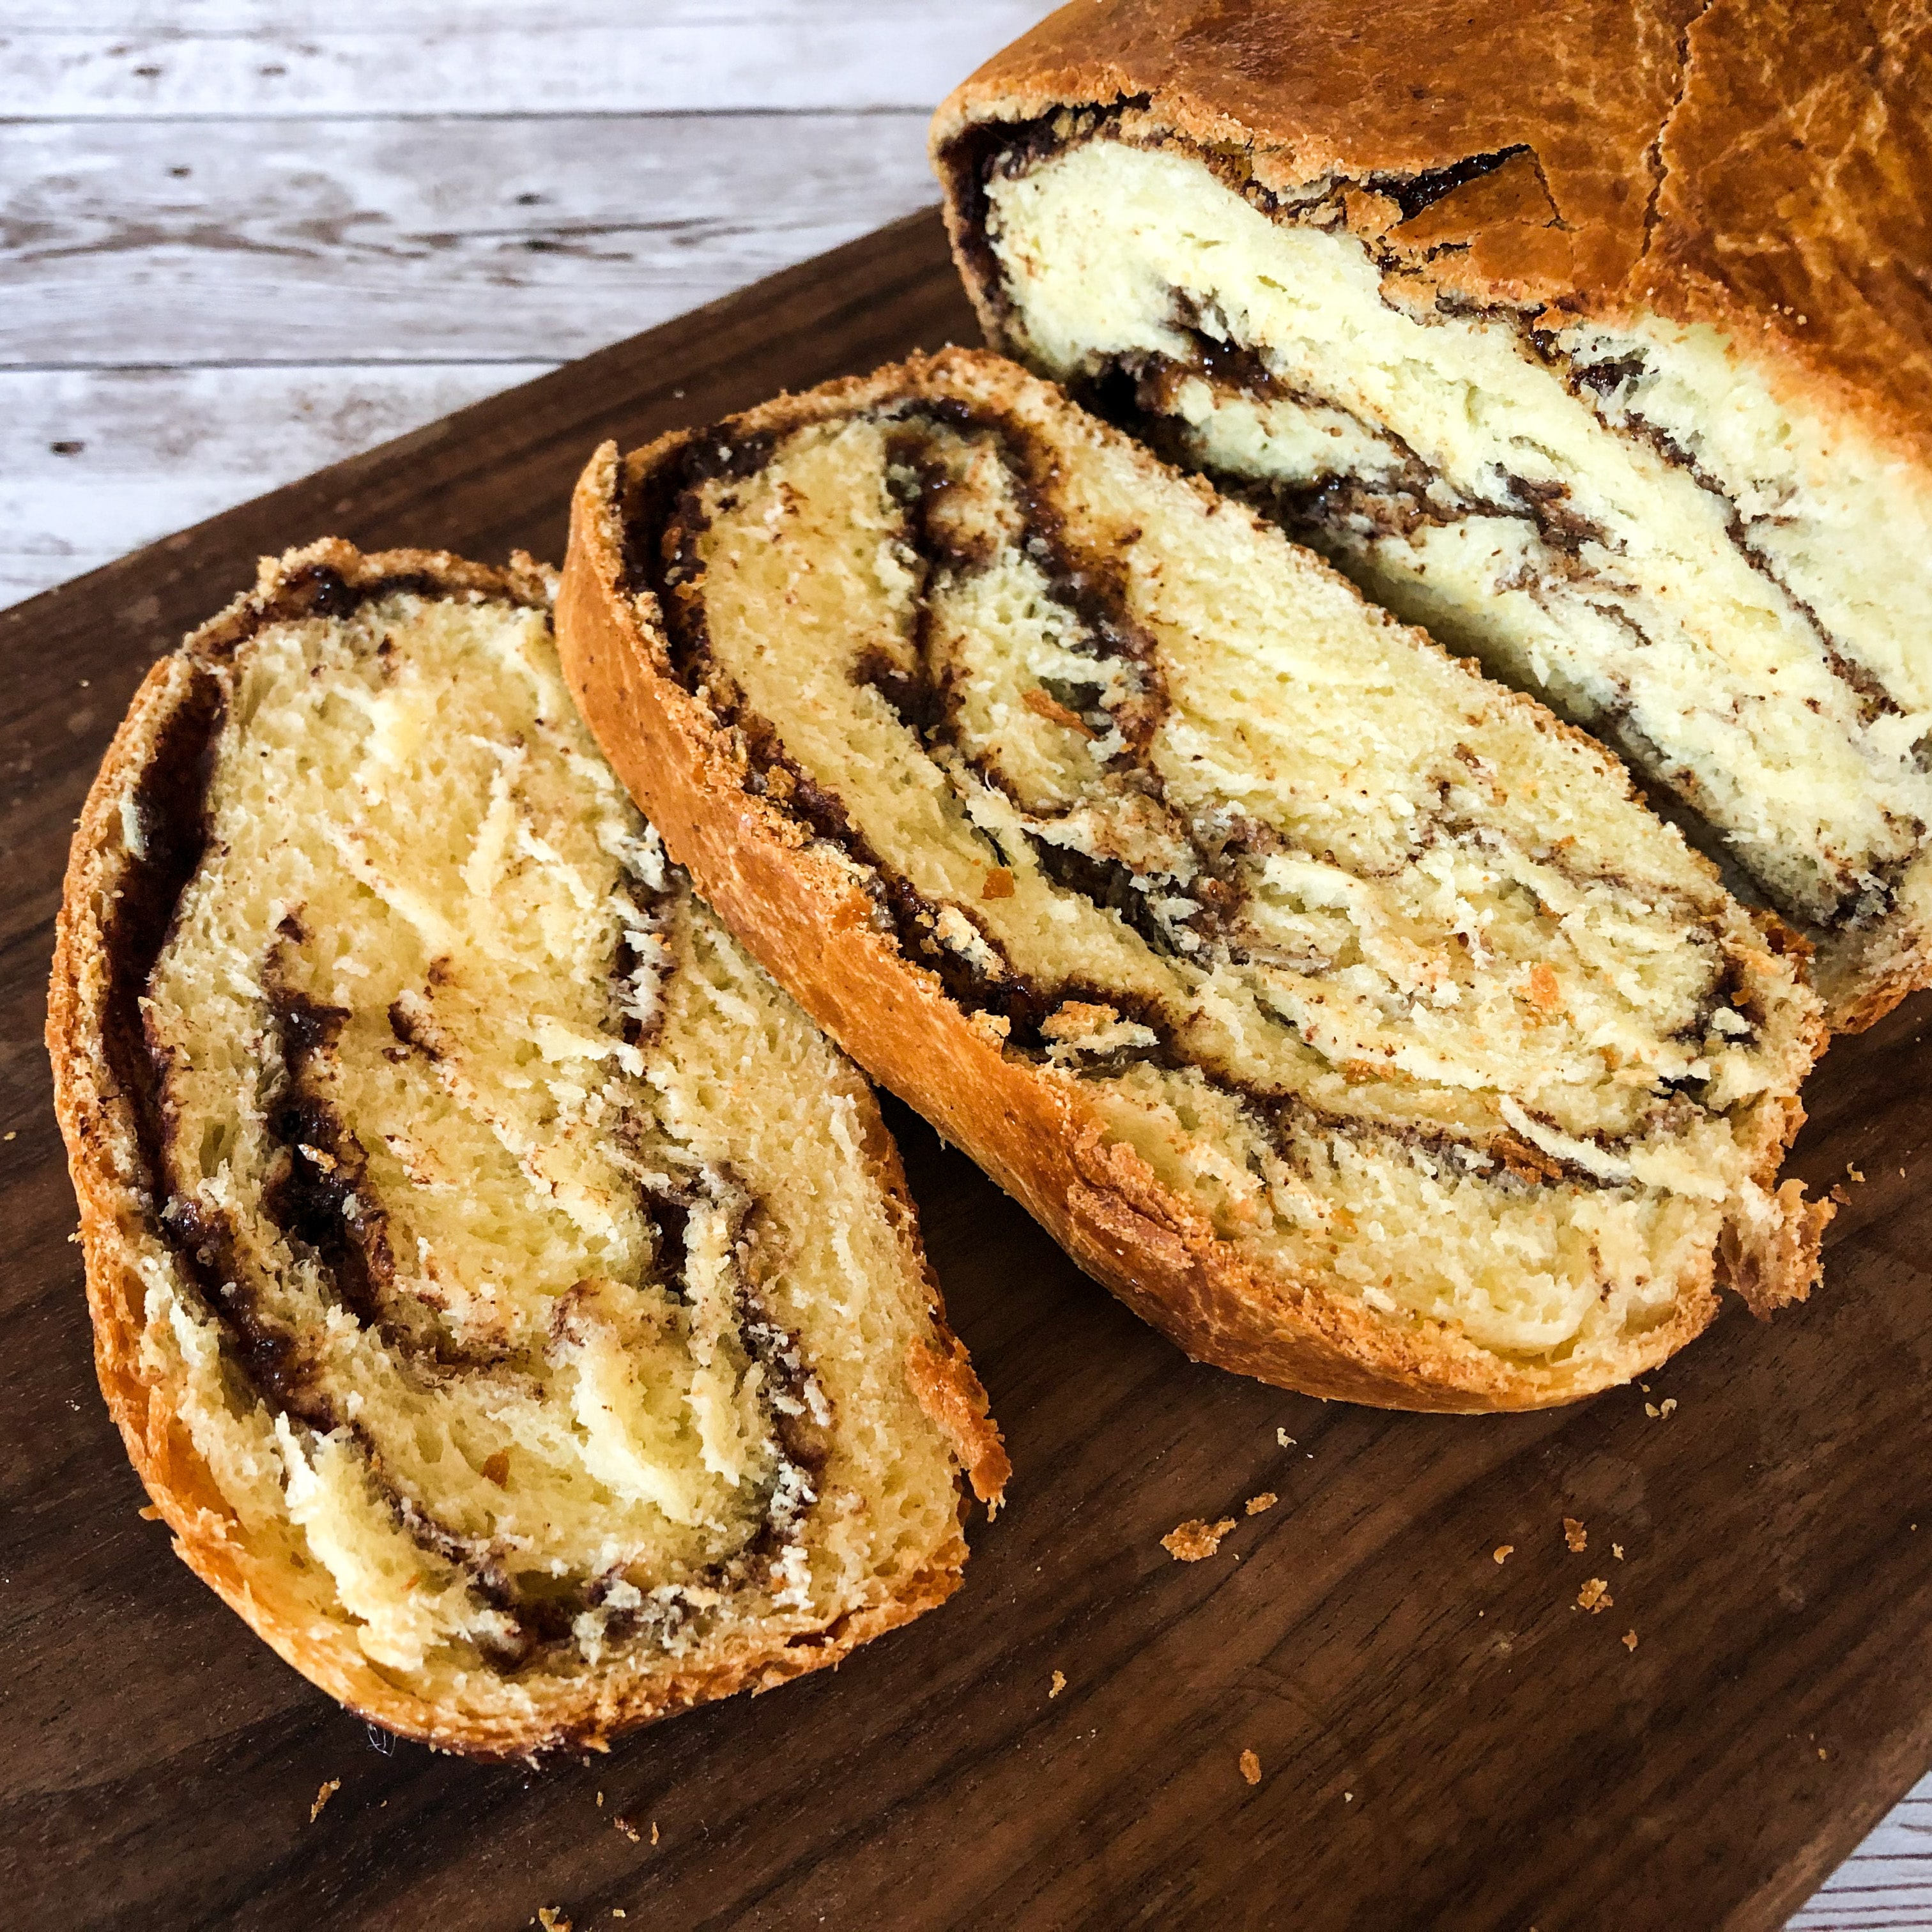
A golden crust encases soft, fluffy brioche bread with a sweet thread of chocolate cinnamon swirled throughout. Every mouthful is full of gooey cinnamon sugar and melted chocolate – the perfect pairing with hot tea or coffee!
Clicke here to jump to recipeI love fresh bread, and I especially love fresh bread when it’s cold outside. Something about cloudy skies and a chilly breeze makes a warm loaf of bread seem that much cozier and more satisfying. This chocolate cinnamon brioche bread is just the thing to munch on while drinking a hot beverage while curled up under a knit blanket. And it makes your house smell like a bakery / chocolate shop hybrid – is there anything better than that?
I know making bread can be a daunting task. It’s so finnicky – you never know if you’re bread is going to rise properly, how long to bake it for, how much kneading needs to go into the dough. After hours of hard work and waiting, you could either end up with a sloppy, doughy mess, or a hockey puck that’s been over proofed or over baked. It’s a real risk! This brioche recipe is simple and beginner-friendly, but you will need patience and some basic understanding of bread -so let’s start with a little theory!
How to make awesome bread
There are 6 stages to making bread – we’ll walk through each one so you’ll be perfectly equipped to tackle this loaf.
- Creating the dough
The first step is measure out and combine your ingredients. Brioche bread is an enriched dough, so instead of simple flour + water + yeast, we’ll be adding in milk, butter, and eggs. In this step, the temperature of your ingredients and the order in which you combine them is important. So be sure to follow the recipe! Luckily, your milk and eggs can be cold out of the fridge. Be sure to use super soft (but not melted) butter – it’ll combine more easily with the other ingredients. - Kneading the dough
Kneading dough is important because it helps develop the gluten in the bread – this is what gives bread it’s wonderful structure and chew. If you don’t knead your bread properly, it’s texture will be off, so take the time to knead properly. Flour your surfaces and your hands to avoid stickiness, and then go for it. I like to push my palm in forcefully into the dough, rotate 45 degrees, and push in again. You’ll know the dough is at the right stage when it becomes smooth and tight. You can also use the window pane test – when you’re able to stretch the dough out thinly enough so that light shines through and the dough doesn’t break, the gluten has developed sufficiently. You’ll have to knead about 5 – 10 minutes for this recipe. - First proof
While kneading is all about action, proofing is all about patience (and temperature). Proofing is when you allow the dough to rest and let the yeast take over. As yeast gobble up the glucose in the dough, they reproduce and produce air that causes the bread to rise. Yeast grow more quickly in warm and humid environments, so proofing speed will differ depending on the day. It’s important to let your bread rest and grow sufficiently during this first proof. A rule of thumb is to let it double in size. Since brioche bread is enriched and has additional fats, it will also take longer to proof – fats make the dough heavier. - Shaping
This stage is when you turn your dough into a loaf, and also when you incorporate the chocolate and cinnamon sugar. I stretch out the dough with my hands to avoid overworking, and when I coil the dough, I don’t do it too tightly. Otherwise, you may have trouble baking the loaf thoroughly. - Second proof
Another round of patience to ensure that your loaf reaches a proper size before going into the oven. If you don’t proof long enough on the second proof, the dough may rise too quickly and then collapse when it hits the warmth of the oven. Once the dough has risen above the edge of the bread pan, it’ll be ready for baking. If you want to have fresh bread in the morning, this recipe gives you the option to finish your second proof in the refrigerator overnight, since the cold temperatures will slow down the yeast. - Baking
Everyone’s oven is a little different, so the best way to ensure your oven is at the right temperature is to use an oven thermometer. You won’t need any steam for this brioche loaf, so you can just pop it in on the middle rack. To check if your bread is done, tap the top with a spoon – a hollow sound indicates that the middle is cooked through. Be careful not to overbake, as your crumb will turn out dry and crumbly instead of soft and pillowy.
Tips for this chocolate cinnamon brioche bread
- Make sure your butter is very soft so it can be easily incorporated into your dough
- If you have a stand mixer, use the paddle attachment to mix the butter and milk. Use the dough hook attachment to add in the flour
- The dough will be slack and quite wet at first, so flour surfaces and hands generously. It will firm up as you knead.
- Grease your pan thoroughly so you can slide the loaf out
- Brush the top with egg wash so it turns out a beautiful golden brown color
Other enriched bread recipes:
If you make this recipe, let me know! I always love to see what my readers are baking. You can comment below or tag me on Instagram @halicopteraway.
Recipe is adapted from Bread Baking for Beginners by Bonnie Ohara – an excellent book that I recommend if you’re getting into bread baking!

Chocolate cinnamon brioche bread
Equipment
- large bowl
- two 9in by 5in by 3in loaf pans
- pastry brush (optional)
- dough scraper (optional)
- stand mixer (optional)
Ingredients
For the dough
- 2/3 cup (156g) whole milk
- 5 (256g) large eggs
- 1/3 cup (72g) granulated sugar
- 2 tsp (6g) yeast
- 1 1/2 sticks (180g) butter (3/4 cup)
- 5 cups (600g) all-purpose flour
- 2 tsp (12g) salt
- oil or cooking spray
For filling
- 1 cup (100g) brown sugar
- 4 oz semi-sweet chocolate, chopped fine
- 2 tbsp (10g) cinnamon
For egg wash
- 1 egg
- 2 tbsp milk or water
Instructions
- Combine milk, eggs, butter, yeast, and granulated sugar in a large bowl and mix with a whisk or paddle attachment of stand mixer
- Add flour and salt on top of the wet ingredients, and combine with hand or dough hook attachment of stand mixer until well combined. The dough will be wet and slack
- Cover with floured kitchen towel or paper towel and rest for 20 – 30 minutes so flour can absorb liquid ingredients
- Turn out dough onto floured surface and knead for 5-10 minutes until it has tightened and smoothed. Check to see if gluten has developed with the window pane test (see above)
- Cover with floured kitchen towel or paper towel and let rest for 1.5 – 2 hours for the first proof. The dough should approximately double in size and should be light and springy to the touch
- Combine cinnamon and brown sugar for filling while the dough proofs and grease your loaf pans
- Turn out dough onto floured surface and divide into two. Stretch one portion of the dough evenly with your hands until it is approximately an 8 in. by 12 in. rectangle. Distribute half the cinnamon and brown sugar mixture evenly across the dough rectangle. Then, distribute half the chopped chocolate on evenly on top of the cinnamon and sugar. Roll the rectangle toward you on the shorter 8 in. side, so that you have a 12 in. coiled cylinder, making sure not to roll too tightly. Gently press the dough together to seal the seam. Tuck the ends under the coil and fold into the loaf pan. Repeat with the second portion of dough and place into second loaf pan.
- Cover with floured kitchen towel or paper towel and let rest for 1.5 – 2 hours for the second proof. Optionally, after 1.5 hours of proofing at room temperature, place in refrigerator to finish proofing overnight. The dough should rise above the lip of the loaf pan and should not spring back when pressed
- Preheat oven to 375 degrees F while dough is proofing
- Whisk together egg and milk or water to create an egg wash. Brush over the tops of the loaves using a pastry brush
- Place loaves in middle rack of the oven and bake for 40 minutes until golden brown. They will sound hollow when you tap them with a spoon
- Let cool for 5-10 minutes before sliding out of the loaf pans. Let cool for another 10 – 20 minutes on a wire rack before slicing and serving
okay but what hot beverage should I sip with this??
Can this recipe be used using a bread machine. If yes, do I need to make adjustments?
Hi Helen, thanks for stopping by! I’ve only ever made this recipe by hand or with a stand mixer, never with a bread machine. You may be able to use your bread machine for mixing and rising, but will need to roll in the chocolate cinnamon by hand. I would suggest checking out this guide: https://www.kingarthurflour.com/blog/2018/04/30/how-to-convert-recipes-to-a-bread-machine, or finding a brioche recipe made specifically for a bread machine, such as this one: https://www.food.com/recipe/bread-machine-brioche-130770
Good luck and let me know how it turns out 🙂